 how-to
Beginner Motocross Drills for Kids: Step-by-Step Guide
Table of Contents
- Safety Gear and Getting Started
- Dirt Bike Balance Drills for Kids
- How to Teach a Child to Use a Clutch
- Body Positioning and Throttle Control Drills
- Figure-Eight Turning and Low-Speed Maneuvers
- Youth Motocross Practice Schedule and Progression
- Mental Preparation and Building Rider Confidence
- Common Mistakes to Avoid
- Frequently Asked Questions
Last Updated: September 20, 2026
Safety Gear and Getting Started
Before your child touches a dirt bike, gear comes first. A helmet is non-negotiable, look for a full-face or modular helmet rated for motocross, which has extended chin protection and better ventilation for off-road conditions.
Beyond the helmet, your child needs:
- Goggles with clear or tinted lenses depending on light conditions
- Motocross jersey and pants (not regular clothes)
- Gloves designed for dirt bikes
- Boots that cover the ankles
- Chest protector or roost guard
- Knee and elbow pads
Proper fit is critical. Have your child wear everything during the first practice session and adjust before starting drills.
Start on flat ground with zero obstacles. Have your child walk around in full gear for 10-15 minutes to adjust to the weight and feel.
Let your child sit on the bike while it's off and practice mounting and dismounting. Show them the throttle, clutch, and brake. The goal is familiarity, not skill.
Dirt Bike Balance Drills for Kids
Balance is the foundation of everything in motocross. Start with your child sitting on the seat with both feet flat on the ground to teach center of gravity.
Next, have your child walk the bike forward while sitting on it, feet touching but not pushing. This builds awareness of how the bike moves beneath them.
Progress to slow-speed riding in a straight line at walking pace, focusing on keeping the bike upright. Straight-line balance takes 2-3 sessions to feel natural.
Once straight-line balance is solid, add gentle weight shifts from the hips during turns to teach the connection between body position and bike control.
A common mistake is letting kids grip the handlebars too tightly. Encourage a relaxed grip, the handlebars should guide the bike, not fight it.
How to Teach a Child to Use a Clutch
Before teaching the clutch, verify your child can reach and pull the lever with a relaxed hand. If the lever is too far or stiff, adjust it closer or use a short-pull lever designed for youth riders.
Start with the bike off. Have your child pull the clutch lever in and out slowly 10 times to feel the resistance and understand that pulling disengages the engine from the wheel.
Start the engine in neutral and have your child hold the clutch in while you rev gently. They'll feel the bike want to move but stay still, learning that the clutch controls forward motion.
Teach clutch modulation: release the clutch slowly while adding a tiny bit of throttle. The bike should move forward smoothly. Use these coaching cues:
For smooth release: "Imagine you're opening a door very slowly. Not fast, not jerky. Slow and steady. Count to three while you let the lever out. One... two... three. That's the speed we want."
For throttle timing: "When the bike starts to move, that's when you add just a tiny bit of gas. Like turning a doorknob one inch, not all the way. If the wheel starts spinning, you added too much. If the bike lurches, you let the clutch out too fast."
Practice in a straight line at low speed for 5-10 minutes. Most beginners release the clutch too quickly; slow release is always the answer.
Common failure modes and how to coach through them:
The Lurch (bike jerks forward suddenly): This happens when the clutch releases too fast. Coaching cue: "That jerk means you let go too quick. Try counting to three again. Slower this time. The slower you let it out, the smoother it feels."
The Stall (engine dies): This usually means the clutch released all the way but no throttle was added, or throttle was added too late. Coaching cue: "The engine needs a little gas to keep running. When you feel the bike start to move, twist the throttle just a tiny bit. Not a lot. Just a little."
The Spin (rear wheel spins, bike doesn't move forward smoothly): Too much throttle too soon. Coaching cue: "You gave it too much gas. Remember the doorknob, just one inch. Try again, but this time add even less throttle."
The Grip (child's hand gets tired or shaky): Tension in the hand means tension everywhere. Coaching cue: "Your hand looks tight. Shake it out. Now hold the lever like you're holding a bird, firm enough it doesn't fly away, but gentle enough it doesn't get hurt. Try again."
Once they understand clutch and throttle relationship, progress to gentle turns. Master straight-line control first.
After several sessions, the clutch becomes automatic and they're ready for more complex drills.
Body Positioning and Throttle Control Drills
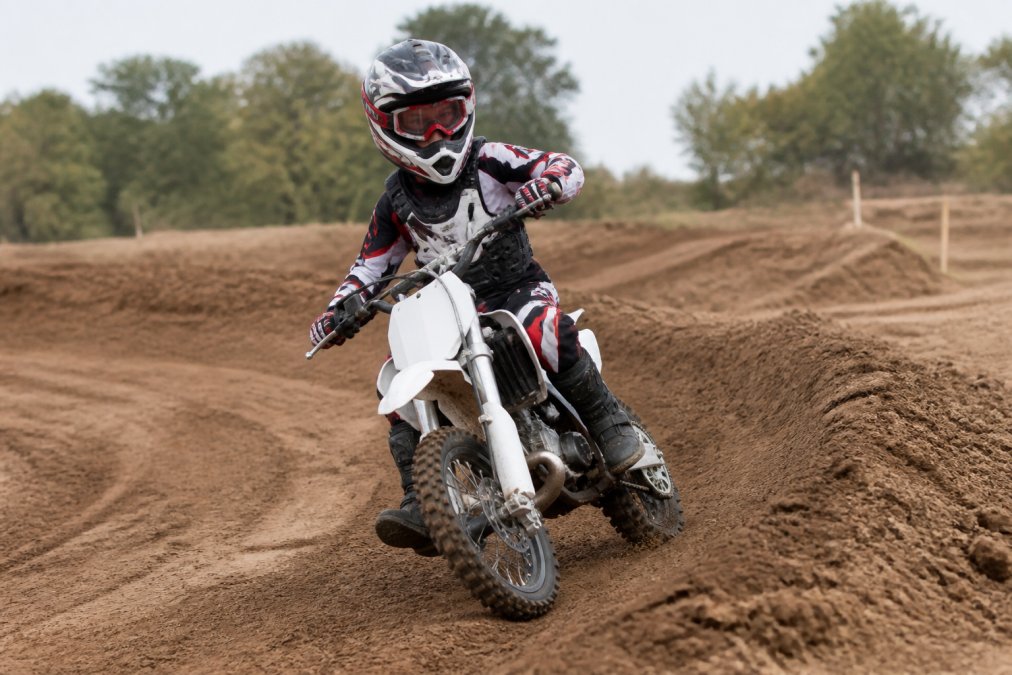
Body positioning determines control. Your child should sit toward the back of the seat with knees gripping the fuel tank to anchor the lower body and keep the upper body relaxed.
Nelmgerian MX Training Journal →
Hold handlebars lightly with elbows up and out. Keep the head level, looking ahead, not down.
Teach smooth, progressive throttle input, like turning a doorknob slowly, not flicking a switch. Have your child practice rolling on throttle in a straight line.
Practice throttle modulation by accelerating then reducing throttle without braking. Smooth inputs prevent wheel spin and loss of traction.
Combine body positioning with throttle control by riding in gentle circles.
Figure-Eight Turning and Low-Speed Maneuvers
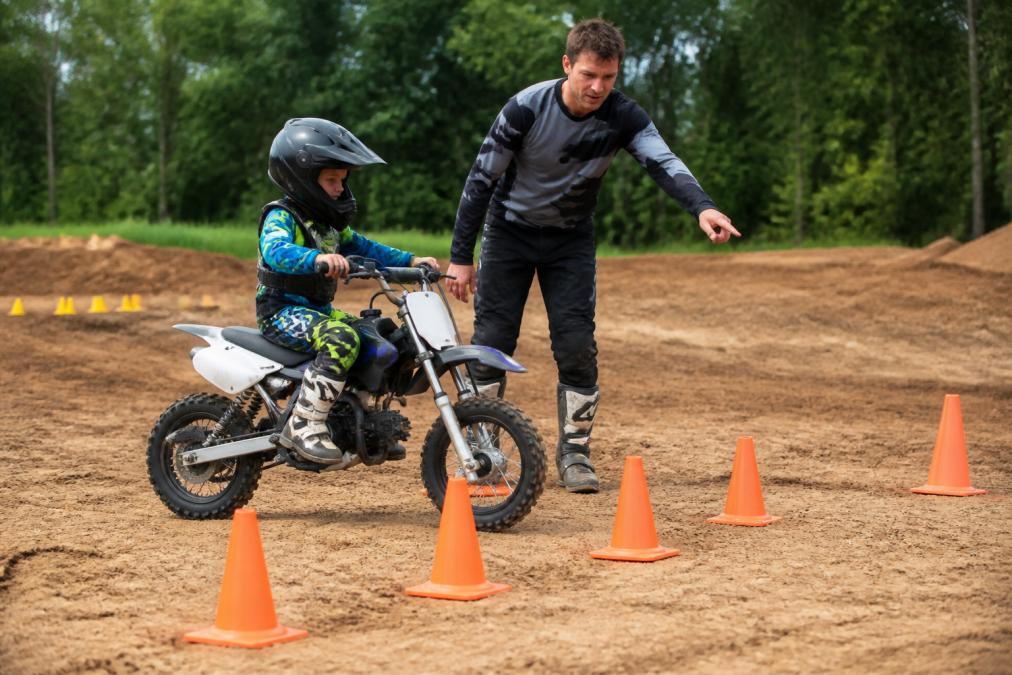
Figure-eight drills teach turning at low speed. Set up two cones 30 feet apart and have your child ride in a figure-eight pattern at walking speed, focusing on smooth steering and balance.
Youth Motocross Practice Schedule and Progression
Structure matters. A typical practice session should last 30-45 minutes for kids aged 5-9. Longer sessions lead to fatigue and bad habits.
- Seat height: Your child should sit on the seat with both feet flat on the ground (or nearly flat). If only tiptoes touch, the seat is too high and creates instability.
- Handlebar reach: Your child's arms should have a slight bend when holding the bars. If they're stretched out or cramped, adjust the bar position or use a riser/lowering kit.
- Clutch and brake lever reach: Levers should be within comfortable reach without your child having to stretch or contort their hand. Short-pull levers are common for youth bikes.
- Suspension sag: Have a suspension technician set sag for your child's weight. Incorrect sag makes the bike feel unstable.
- Foot pegs: Pegs should be positioned so your child's leg has a slight bend when standing. Pegs that are too high or too low create poor body positioning.
Once the bike fits, follow this week-by-week progression:
Weeks 1-2: Foundation and Comfort
- Mounting and dismounting (5 min)
- Walking the bike while seated, feet dragging lightly (5 min)
- Straight-line riding at walking pace (10 min)
- Free riding and exploration (10 min) Mastering these initial movements builds the necessary confidence to expand upon motorcycle riding basics as your young rider prepares for more technical terrain.
Weeks 3-4: Clutch and Throttle Control
- Straight-line riding with smooth clutch release (10 min)
- Throttle modulation in a straight line without braking (10 min)
- Gentle weight shifts while riding straight (5 min)
- Free riding (10 min)
Weeks 5-6: Turning and Balance
- Figure-eight drills around two cones 30 feet apart (15 min)
- Wide, gentle turns at low speed (10 min)
- Free riding (10 min)
Weeks 7-8: Combining Skills
- Figure-eight drills with tighter turns (10 min)
- Low-speed maneuvers: tight U-turns, riding over small obstacles like PVC pipes (10 min)
- Straight-line riding with speed variation (accelerate, coast, brake gently) (10 min)
- Free riding (5 min)
Weeks 9+: Building Speed and Complexity
- Increase speed gradually on straight sections (10 min)
- Tighter turns at slightly higher speed (10 min)
- Small jumps or obstacles if your child is ready (10 min)
- Free riding (5 min)
Session Structure (Every Practice)
Every session should follow this format:
- Warm-up (5 min): Slow riding to get comfortable. No drills yet. Just feel the bike.
- Focused drill (20-30 min): Work on the week's skill. Use coaching cues. Correct posture and control.
- Cool-down (5-10 min): Free riding where your child just enjoys the bike. No instruction. Let them play.
Frequency and Rest
Mental Preparation Integration
Progress Tracking
When to Extend a Phase
Mental Preparation and Building Rider Confidence
Confidence builds through small wins. Start your child on a bike they can touch the ground with both feet, a 50cc or 110cc bike is right for most kids aged 5-9.
Common Mistakes to Avoid
Rushing progression is the biggest mistake. Skill building takes time. Rushing creates frustration and bad habits.
Frequently Asked Questions
What age is best to start beginner motocross drills for kids?
Most children can begin basic balance and control drills on a 50cc dirt bike between ages 4 and 6, though younger riders (3-4) can start with walking and mounting exercises. The key is matching drills to your child's physical size, coordination level, and comfort. Smaller riders benefit from proper ergonomics and lever adjustments before progressing to throttle and clutch control. Always prioritize protective gear and a supportive learning environment over rushing skill development.
How often should my child practice dirt bike balance drills for kids?
Consistent practice yields the best results. A youth motocross practice schedule should include 2-3 sessions per week, each lasting 30-45 minutes for younger beginners. Short, focused sessions prevent fatigue and frustration while building muscle memory. Pair practice days with rest days to allow recovery and prevent burnout. Track progress using a training journal to identify which drills your child masters first and where they need extra repetition.
How do I teach a child to use a clutch on a dirt bike?
Start with stationary exercises: have your child practice squeezing and releasing the clutch lever while the bike is off. Introduce gentle throttle control once they understand the feel. Begin moving drills in first gear at walking speed, focusing on smooth clutch modulation rather than speed. Use verbal cues like 'squeeze and hold' or 'let it out slowly' to build muscle memory. Progress to figure-eight drills only after your child confidently engages and disengages the clutch without stalling or jerking.
What protective gear do kids need for motocross drills?
Essential gear includes an approved motocross helmet, goggles, chest protector, gloves, long-sleeved jersey, pants, and boots that cover the ankles. All protective equipment must fit properly to be effective. Ensure your child wears full gear during every drill session, including low-speed practice. This builds the habit of safety while protecting against falls and minor injuries. Check that gear fits as your child grows, and replace items that show wear or damage.