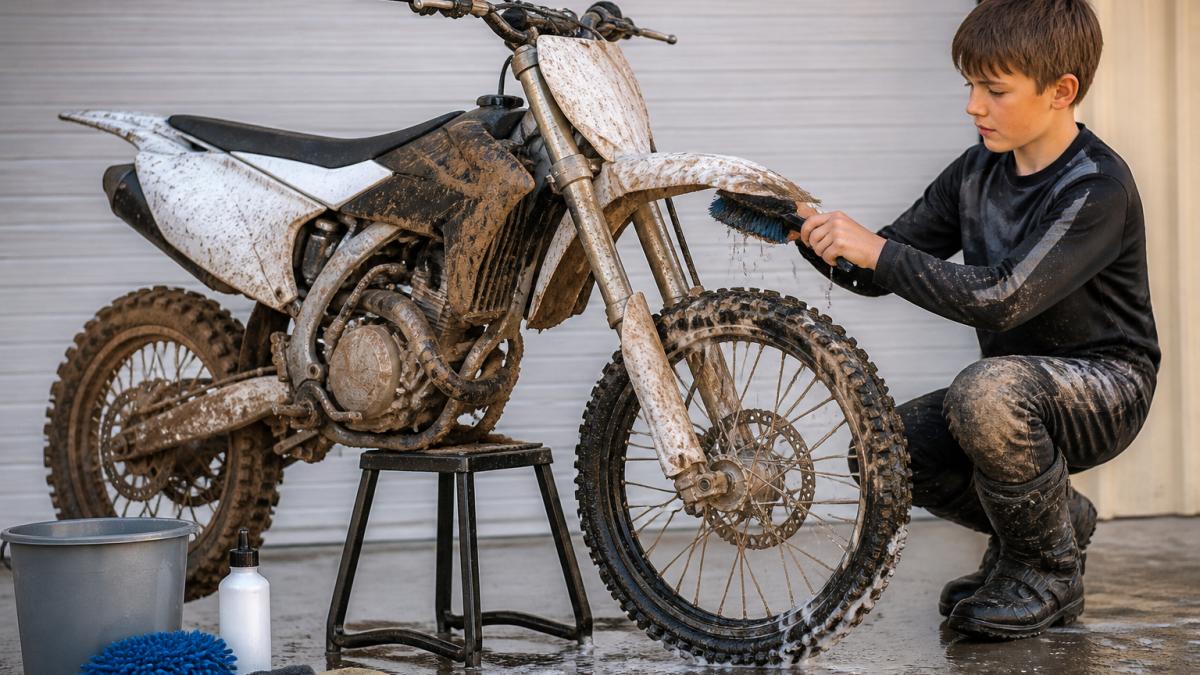
 how-to
How to Clean Your Dirt Bike Properly: 7 Steps
Table of Contents
- Assembling Your Cleaning Kit
- Removing Loose Debris and Mud
- Pressure Washing Techniques for Dirt Bikes
- Choosing the Right Cleaning Agents and Degreasers
- How to Clean a Dirt Bike Air Filter
- Rinsing, Drying, and Rust Prevention
- Post-Ride Dirt Bike Cleaning Routine
- Lubrication and Final Maintenance Steps
- Frequently Asked Questions
Last Updated: October 1, 2026
Assembling Your Cleaning Kit
Before you clean your dirt bike, gather the right tools to clean your dirt bike properly. Start with a pressure washer (1500-2000 PSI); higher pressure damages seals and electronics. A garden hose works if you lack a pressure washer, though it's slower.
Collect soft bristle brushes (they remove grime without scratching) and microfiber cloths for drying. Avoid hard brushes, which gouge finishes.
Stock up on cleaning supplies:
- Degreaser for the chain and engine
- Bike wash or mild detergent
- Silicone spray for final protection
- Water displacement spray for electronics
- Lubricating oil for post-wash maintenance
A spray bottle helps apply degreaser to tight spots. Buckets hold soapy water and rinse water separately. Work gloves protect your hands from chemicals.
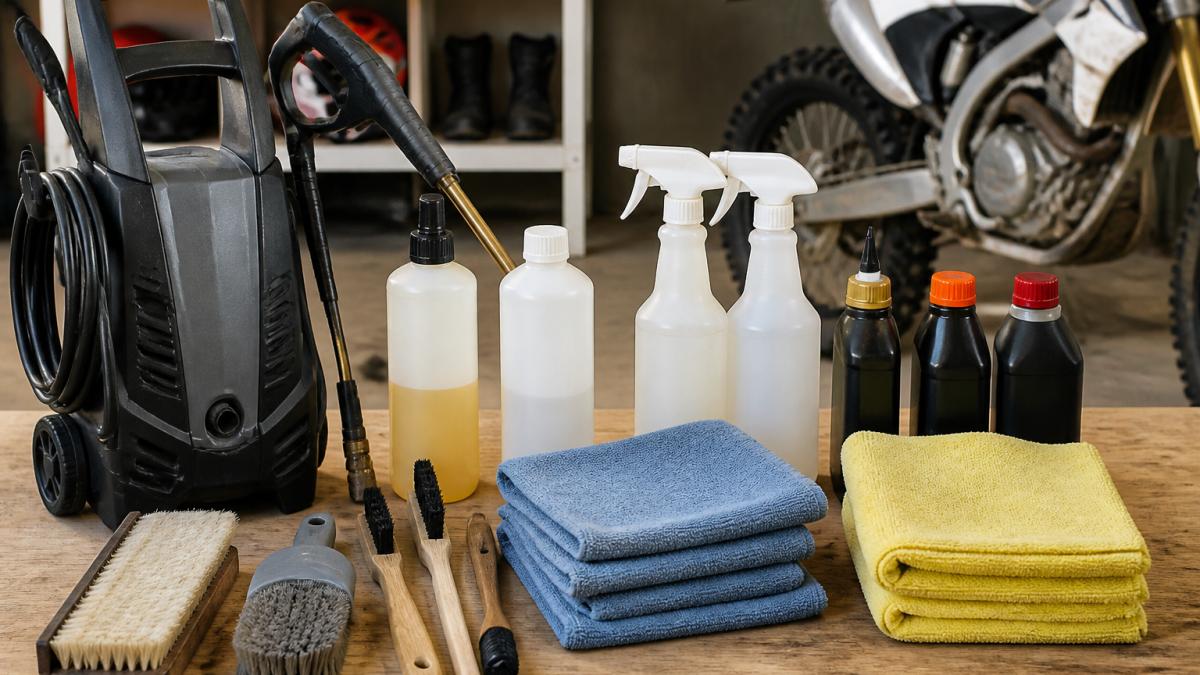
Keep this kit in one place so everything is ready when cleaning day arrives.
Removing Loose Debris and Mud
Start by removing loose mud and debris to prevent it from caking into hard spots. Use your hands to knock dried mud off the frame, wheels, and suspension, working gently around plastic panels.
Use a soft brush on stubborn spots, paying attention to crevices. Rinse with low-pressure water (garden hose on normal setting); avoid the pressure washer, which pushes mud deeper into gaps.
Focus on these areas:
- Wheel rims and spokes
- Chain and sprockets
- Suspension components
- Air filter housing
- Electrical connections
Pressure Washing Techniques for Dirt Bikes
Pressure washing is fast, but modern fuel-injected bikes require caution to avoid damaging electronics and seals.
Pressure Settings and Distance
Keep the nozzle 12-18 inches from the bike. Start at 1500 PSI and increase only on hardy surfaces like wheels and frame. Never exceed 2000 PSI; sealed connectors are rated for lower intensity.
Use a sweeping motion to prevent concentrated pressure. Work top to bottom so water runs downward and doesn't pool in electrical cavities.
Why Modern Electronics Matter
Fuel-injected bikes contain vulnerable sensors: oxygen sensors (cause misfires), ECUs (trigger fault codes), throttle position sensors, and fuel injector connectors (cause no-start). Older carbureted bikes tolerate water better. Treat pressure washing as a precision task on modern bikes.
High-Risk Zones to Avoid or Minimize
Avoid or minimize spray on: electrical connectors (biggest vulnerability), ECU housing, air filter box openings, brake fluid reservoirs, shock seals and suspension pivots, and chain/sprocket gaps.
Engine-Specific Technique
For the engine, use lower pressure and shorter bursts after letting it cool 30 minutes. Never spray into air intakes, carburetor openings, or exhaust ports. For the undercarriage and swingarm, use a garden hose or low-pressure setting.
Post-Wash Electrical Check
After washing, inspect connectors for water droplets. If found, air dry and apply dielectric grease to pins before reconnecting. If the bike won't start after washing, let it sit dry for 24 hours; don't force-start, as water in connectors can permanently damage the ECU.
Choosing the Right Cleaning Agents and Degreasers
Water alone won't remove all the grime. The right degreaser makes a huge difference.
Bike-specific degreasers are gentler than industrial products. They're formulated to protect paint, plastic, and rubber. General-purpose degreasers can strip protective coatings.
Apply degreaser to heavily soiled areas. Let it soak for 5-10 minutes. Soaking time allows the chemical to break down grease and oil. Don't let it dry completely, reapply if needed.
Common degreaser options include:
- Citrus-based degreasers (biodegradable, pleasant smell)
- Petroleum-based degreasers (stronger, faster-acting)
- Enzymatic degreasers (safe for electronics)
- Bike-specific formulas (balanced for all bike components)
For the chain, use a dedicated chain degreaser. It penetrates between links more effectively than general degreasers. Scrub with a soft brush while the degreaser soaks.
Avoid harsh chemicals near plastic parts. They can discolor or crack panels over time. Test any new product on a hidden area first.
How to Clean a Dirt Bike Air Filter
The air filter is critical for engine performance. A clogged filter reduces power and increases fuel consumption. Clean it every few rides if you're in dusty conditions.
Remove the air filter carefully. Check your owner's manual for the exact location and removal steps. Most filters slide out or unscrew from the airbox.
Tap the filter gently to dislodge loose dust. Don't blow compressed air through it, that pushes dirt deeper into the filter material.
Soak the filter in warm, soapy water for 15 minutes. Use mild detergent, not harsh chemicals. Gently squeeze soapy water through the filter material. Rinse with clean water until the water runs clear.
Never scrub or wring the filter. The pleated material tears easily. Let it air dry completely before reinstalling. A wet filter reduces airflow and can damage the engine.
Once dry, apply a light coat of filter oil if using a foam filter. This helps trap dust particles. Reinstall the filter and secure the airbox cover.
A clean air filter improves throttle response and fuel economy. It's one of the easiest maintenance tasks, and young riders can learn to do it themselves with supervision.
Rinsing, Drying, and Rust Prevention
After scrubbing, rinse thoroughly. Use low-pressure water and work from top to bottom. Make sure no soap or degreaser residue remains.
Pay special attention to crevices where water can pool. Trapped water causes rust and corrosion. Use a spray bottle to flush hidden areas.
Dry the bike completely. Microfiber cloths work best, they absorb water without scratching.
Post-Ride Dirt Bike Cleaning Routine
A consistent cleaning routine prevents major buildup and extends component life, but the approach changes depending on whether you're maintaining an active bike or preparing one for storage. Conflating the two leads to either over-cleaning (wasting time and resources) or under-preparing (risking rust and corrosion during downtime).
Routine Post-Ride Cleaning (Active Season)
For a standard post-ride wash:
- Rinse loose mud with a garden hose on normal pressure. Focus on the frame, wheels, and suspension.
- Spray degreaser on the chain and engine. Let it soak for 5 minutes while you rinse other areas.
- Scrub the chain with a soft brush to remove degreaser and grime.
- Final rinse with low-pressure water, working top to bottom.
- Dry with microfiber cloths and apply chain lube while the chain is still slightly damp (lube adheres better).
- Wipe down plastic and painted surfaces with a silicone spray for protection.
Weekly Deep Cleaning (Active Season)
- Pressure wash the entire bike (following the techniques outlined in the pressure washing section).
- Degrease and scrub the chain, sprockets, and linkage with a dedicated chain brush.
- Clean the air filter (tap out dust, soak in soapy water, air dry completely).
- Inspect and clean the undercarriage, swingarm, and suspension components.
- Dry completely and apply protective coatings (silicone spray on plastics, water displacement spray on metal fasteners).
- Check all fasteners for tightness; pressure washing can loosen bolts over time.
Pre-Storage Deep Clean (Off-Season Preparation)
- Complete wash and pressure rinse, Remove all mud, grime, and degreaser residue. Trapped moisture is your enemy during storage.
- Degrease heavily, Chain, engine, undercarriage. Use a bike-specific degreaser and let it soak longer than usual (10-15 minutes). Grease left on the bike during storage can attract moisture and accelerate corrosion.
- Dry aggressively, Use microfiber cloths, compressed air (on low setting, away from electronics), or even a leaf blower to remove water from crevices, under the seat, and inside the airbox. Moisture trapped in these areas will rust metal components and corrode connectors over months of storage.
- Apply protective coatings, Silicone spray on all painted and plastic surfaces. Water displacement spray (like WD-40 or similar) on metal fasteners, chain, and exposed engine parts. These create a moisture barrier during storage.
- Lubricate the chain, Apply a heavier coat of chain lube than usual. During storage, the chain is stationary and vulnerable to rust; extra lube provides extended protection.
- Inspect and address corrosion, Look for any existing rust spots on the frame, fasteners, or suspension. Lightly sand surface rust and apply a thin coat of touch-up paint or rust inhibitor.
- Drain or stabilize fuel, If storing for more than 30 days, either drain the fuel tank completely or add fuel stabilizer to prevent varnish buildup in the carburetor or fuel injectors. Modern ethanol-blended gasoline degrades quickly in storage.
- Cover the bike, Use a breathable motorcycle cover (not plastic, which traps moisture). Store in a dry location, ideally indoors or in a garage.
Maintenance Journal
Lubrication and Final Maintenance Steps
Lubrication is the final step after cleaning your dirt bike. Water and pressure washing remove protective oils. You must replace them.
Frequently Asked Questions
Is Dawn dish soap safe to use on a dirt bike?
Dawn and other household dish soaps can strip protective coatings and damage seals on your dirt bike. Use a dedicated bike wash or degreaser formulated for motorcycles instead. These products clean effectively without harming electronics, gaskets, or the finish. If you must use dish soap, dilute it heavily and rinse thoroughly, then apply a protective spray to prevent corrosion.
What should you avoid when pressure washing a dirt bike?
Never spray electrical connections, the air filter intake, or sealed bearings directly with high pressure. Avoid pointing the nozzle at the engine, carburetor, or any openings where water can enter. Use low to medium pressure (below 2000 PSI) and keep the nozzle at least 12 inches away from sensitive areas. High-pressure water can force moisture into electronics and cause rust or electrical failure.
How often should you deep clean your dirt bike?
Perform a basic post-ride cleaning routine after every ride to remove mud and grime. A thorough deep clean with degreaser and detailed scrubbing should happen every 4-6 rides or once a month during regular riding season. If you ride in wet, muddy conditions frequently, increase deep cleaning to every 2-3 rides. Regular maintenance prevents buildup and extends the life of components.
Can water damage the air filter or electrical components on a dirt bike?
Yes. Water entering the air filter restricts airflow and causes the engine to run poorly. Electrical connections and sealed components can corrode or short-circuit if exposed to direct water pressure. Always remove the air filter before washing and clean it separately. Cover electrical connectors and avoid spraying the engine block, battery, and wiring harness directly. Dry all components thoroughly after washing.
Learning to clean your dirt bike properly builds skills that matter on and off the track. Young riders who master maintenance develop confidence, responsibility, and a deeper connection to their sport. Whether you're preparing for race day or maintaining between rides, a clean bike performs better and lasts longer. Start with the basics, develop a routine, and watch how proper care transforms your riding experience.