 how-to
Dirt Bike Riding Drills for Beginners: 2026 Guide
Table of Contents
- Why Dirt Bike Riding Drills Matter for Beginners
- Essential Dirt Bike Body Position Tips for New Riders
- How to Practice Clutch Control on a Dirt Bike
- Core Riding Drills: Figure-Eights, Cone Drills, and Slow-Speed Control
- Braking Exercises and Cornering Techniques for Beginners
- Building a Beginner Motocross Practice Schedule
- Mental Preparation, Warm-Up, and Post-Ride Analysis
- Frequently Asked Questions
Last Updated: September 16, 2026
Why Dirt Bike Riding Drills Matter for Beginners
Every skilled rider started with the same wobbly first laps. Structured dirt bike riding drills for beginners turn that wobble into control, and control keeps young riders safe and having fun.
Essential Dirt Bike Body Position Tips for New Riders
Correct body position is the foundation every other skill builds on. A rider who stands balanced and looks ahead will corner, brake, and absorb bumps better than one who sits stiffly staring at the front fender.
Standing Position and Elbows Up
Riders should stand with knees slightly bent, weight centered over the pegs, and elbows up and out. This lets the arms absorb impacts instead of locking up and keeps the center of gravity low enough to react quickly.
Weight Distribution and Gaze Control
Weight shifts forward under acceleration and back under braking. Gaze control matters just as much: look where you want to go, not at the obstacle you want to avoid. Staring at the front wheel makes every bump feel bigger than it is.
How to Practice Clutch Control on a Dirt Bike
Clutch control separates riders who stall constantly from riders who move smoothly. The goal is learning the friction zone, where the clutch engages and power reaches the rear wheel.
Finding the Friction Zone
Riders should release the clutch slowly until the bike just creeps forward, then pull it back in. Repeat ten times in a straight line before adding throttle. This teaches the hand exactly where engagement happens.
Clutch Modulation Drills for Kids
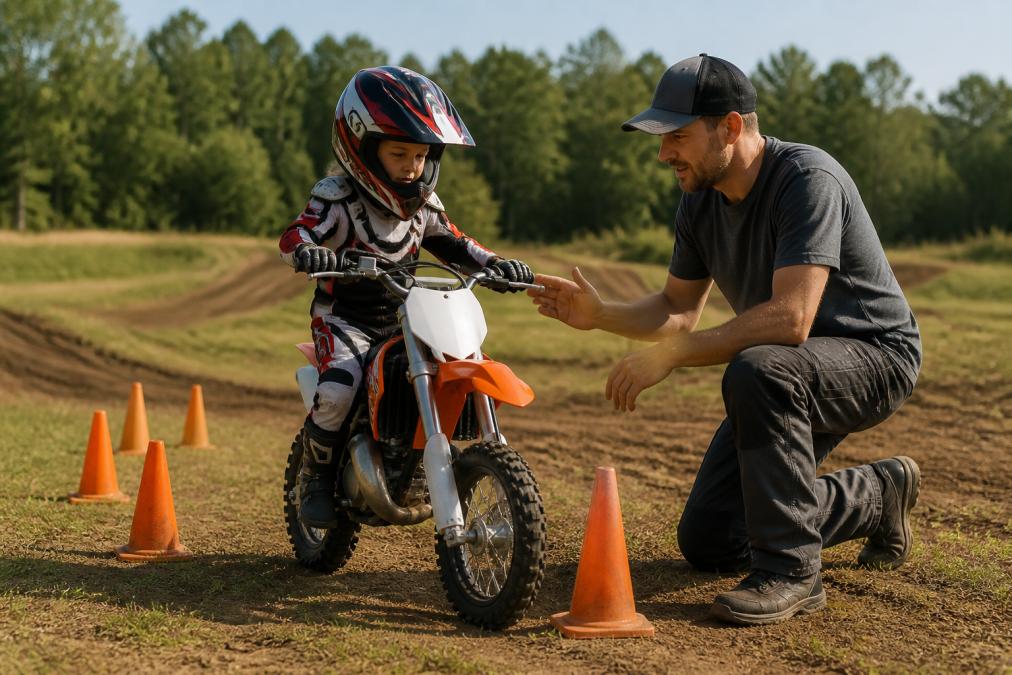
For younger riders on small bikes, keep sessions short and celebrate small wins. Set two markers twenty feet apart and have the rider creep between them using only the clutch, no throttle. Clutch modulation at walking pace builds the fine motor control slow-speed riding demands.
Core Riding Drills: Figure-Eights, Cone Drills, and Slow-Speed Control
Figure-eight drills, cone drills, and slow-speed control exercises form the core of any beginner practice session. They teach bike balance, line selection, and throttle management at speeds where mistakes stay small. What separates a productive session from a frustrating one is course setup and how difficulty is added.
Course Setup Basics
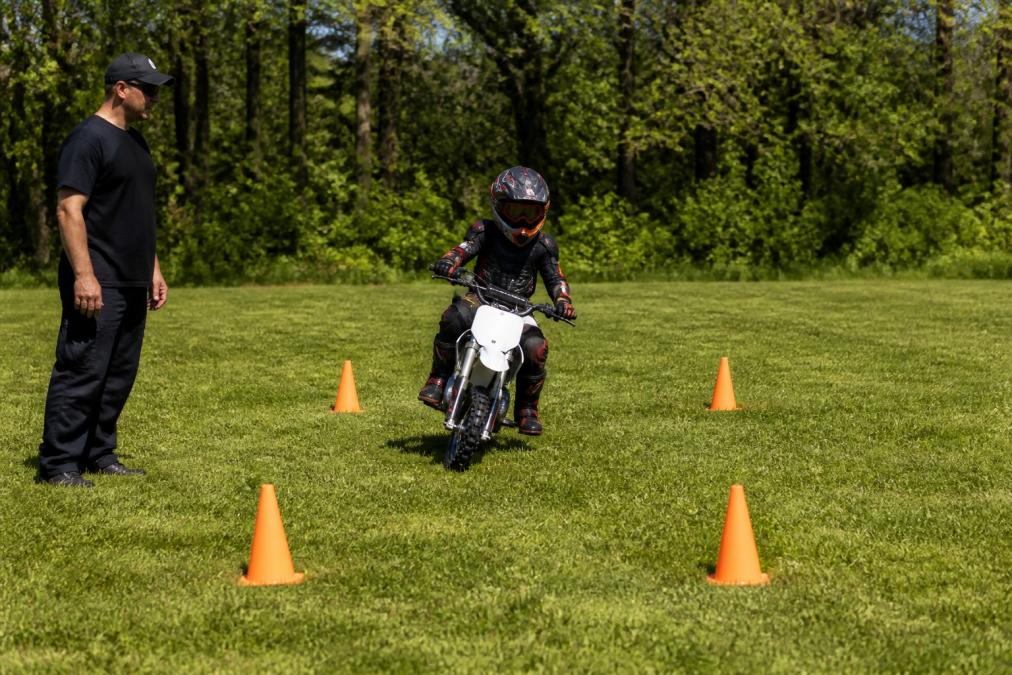
You need three things: a flat area roughly the size of a tennis court, six to eight cones (soccer cones or cut plastic bottles work fine), and consistent traction. Hard-packed dirt or short grass is ideal. Avoid loose sand, wet clay, and gravel for the first few weeks, inconsistent traction hides whether the rider's inputs or the ground caused a mistake.
The Five Core Drills, With Setup and Progression
-
Figure-eight drill. Set two cones ten to fifteen feet apart. Ride a smooth figure-eight around them, crossing the middle each lap. This teaches counter-steering, weight distribution, and looking through the turn. Progression: start at walking pace with feet on the pegs; after ten clean laps, tighten the cones to eight feet, then add a center cone to force a tighter crossover.
-
Cone weave. Space five cones in a straight line, six feet apart. Weave through them standing on the pegs. It builds throttle control and body positioning at low speed. Progression: begin seated, then standing; reduce spacing to four feet; then weave one-handed (alternating hands) to expose any death-grip on the bars.
-
Slow race. Two riders start side by side and race to a finish line twenty feet away as slowly as possible without putting a foot down or stalling. It forces constant clutch and rear-brake modulation. Progression: shorten the distance to fifteen feet, then require a complete stop at the midpoint and a restart without touching the ground.
-
Pivot turns. Practice tight turns by shifting weight to the outside peg and rotating the bars. Start wide, then tighten the radius as confidence grows. Progression: mark a starting box, ride out ten feet, pivot 180 degrees, and return. Time the rider against their own previous best, not other riders.
-
Stop-and-go. Ride ten feet, stop fully with both feet on the pegs, then start again. Repeat twenty times. This sharpens the friction zone and rear brake together, the exact combination used in technical trail riding. Progression: add a cone to stop next to, then a second cone to stop between, narrowing the gap over sessions.
Terrain-Specific Variations
Once the rider can complete all five on hard-pack, add one terrain variable per session:
- Hard-pack: the default. Fastest surface, least forgiving of front-brake grabs.
- Short grass: slightly less traction, good for teaching smooth throttle because wheelspin is easy to feel.
- Loose dirt or fine gravel: reduces grip noticeably. Run the slow race and stop-and-go here to build clutch feel; skip figure-eights until the rider is comfortable.
- Sand or mud: save for later. These surfaces require standing position and momentum, and they punish slow-speed drills. Introduce them only after the rider can hold a standing position for a full lap.
Session Structure and Troubleshooting
Keep sessions to fifteen or twenty minutes per drill. Young riders lose focus quickly, and short, focused repetitions beat long, sloppy ones. Run drills in this order: slow-speed control first (slow race, stop-and-go), then figure-eights and cone weave, then pivot turns last when the rider is warm but not yet tired. Proper body positioning during these maneuvers is further supported by selecting the right motocross racing apparel to ensure both comfort and protection throughout the training session.
Common problems and fixes:
- Rider puts a foot down constantly. The bike is going too slow for the gear. Shift up one gear and use more clutch slip.
- Rider stalls in the figure-eight. They are looking at the front wheel. Move their gaze to the next cone.
- Rider drifts wide on the weave. They are sitting. Have them stand and grip the bike with their knees.
- Rider grabs the front brake in a slow turn. Remove the front brake from the drill entirely for one session; use rear brake only.
Braking Exercises and Cornering Techniques for Beginners
Braking and cornering are where most beginner crashes happen, so they deserve dedicated practice. Teach this rule first: brake in a straight line, then turn.
Building a Beginner Motocross Practice Schedule
A beginner motocross practice schedule works best when it is short, repeatable, and consistent. Two focused sessions per week beat one long, exhausting session, especially for riders under ten.
Weekly Practice Template
| Day | Focus | Drills | Duration |
|---|---|---|---|
| Tuesday | Body position | Standing position, gaze control | 20 minutes |
| Thursday | Clutch control | Friction zone, slow race | 20 minutes |
| Saturday | Core skills | Figure-eights, cone weave, braking markers | 30 minutes |
| Sunday | Free ride | Light drills plus fun laps | 20 minutes |
Adjust the template to your family's schedule. The structure matters more than the specific days.
Mental Preparation, Warm-Up, and Post-Ride Analysis
Most guides skip the mental side of riding, and that is a mistake. Confidence building starts before the engine does, and the riders who improve fastest usually have a repeatable pre-ride and post-ride routine, not the longest rides.
Pre-Ride Mental Prep (Five Minutes)
Before the engine starts, run this short sequence with your rider:
- Name one skill. Have the rider say out loud the single skill they want to improve today. One skill, not five. "Smoother clutch" or "looking through the turn" are good answers. "Getting faster" is not.
- Visualize one lap. Ask the rider to close their eyes and picture themselves riding the course smoothly. Ten to twenty seconds is enough. Visualization primes the same motor patterns the drill will reinforce.
- Set a process goal, not an outcome goal. "Ten clean figure-eights" is a process goal. "Beat my brother" is an outcome goal. Beginners improve faster when the target is something they fully control.
- Name one thing that might go wrong and the response. "If I stall, I squeeze the clutch, restart, and keep going." Pre-deciding the response removes the panic that turns a small mistake into a big one.
Warm-Up and Injury Prevention
Five minutes of warm-up protects young bodies and improves the first ten minutes of practice, often when the best learning happens.
- Two minutes of light movement: jumping jacks, arm circles, walking lunges. The goal is to raise heart rate and loosen joints, not to tire the rider out.
- One minute of wrist and ankle circles: these joints take the most abuse on a dirt bike and are the easiest to overlook.
- One minute of grip and forearm work: squeeze a tennis ball or a stress ball ten times per hand. Forearm pump is a common reason beginners quit a session early.
- One minute of neck and shoulder rolls: helmets are heavy, and neck fatigue shows up as poor gaze control late in a session.
Post-Ride Analysis Checklist
Beginners do not know how to evaluate their own performance, so give them a short checklist. Ask these four questions after every session, and write the answers down:
- What felt good today? Name one specific thing. "My starts felt smooth" is better than "it was fun."
- What felt hard? Name one specific thing. "I kept stalling in the figure-eight" gives the next session a target.
- What did I do differently than last time? This question builds the habit of noticing change, which is the core of self-correction.
- What is one thing I will try next session? One item only. A long list becomes a long list of things not done.
Frequently Asked Questions
What are the best dirt bike riding drills for beginners to build confidence?
Start with slow-speed cone drills and figure-eights. These teach clutch modulation, body positioning, and bike balance at low speeds where falls are less likely. Add braking exercises in a straight line, then progress to cornering techniques. Practice 15-20 minutes per session, three times a week. Confidence grows when skills are repeated in small, achievable steps.
How often should beginners practice dirt bike riding drills?
Three short sessions per week work better than one long weekend ride. Each session should last 20-30 minutes for young riders, focusing on one or two drills at a time. A beginner motocross practice schedule that alternates skill work with free riding keeps kids engaged without burnout. Consistency matters more than duration.
What is the 12-second rule on a motorcycle?
The 12-second rule means scanning at least 12 seconds ahead of your current position. For beginners, this builds gaze control and line selection early. On a dirt bike, looking 12 seconds ahead helps riders anticipate terrain features, choose lines through corners, and avoid reacting too late. Practice this during every drill by picking a target far ahead before entering a turn.
How can parents track their child's progress with riding drills?
Use a training journal to log each practice session, noting which drills were completed and what improved. The Nelmgerian MX Training Journal provides a structured way to record goals, track skill progression, and build confidence between rides. Reviewing entries weekly helps parents and young riders see real improvement over time.