 how-to
How to Choose Youth Motocross Boots: A Parent's Guide
Table of Contents
- Why Proper Youth Motocross Boots Matter
- Measuring Your Child's Foot for Motocross Boots
- Understanding Youth Motocross Boot Sizing Charts
- Key Safety Features and Protection Levels
- Comfort and Fit Considerations
- How to Break in Dirt Bike Boots Properly
- When to Replace Kids Motocross Boots
- New vs. Used Boots and Making the Right Choice
Last Updated: August 9, 2026
Why Proper Youth Motocross Boots Matter
Choosing the right youth motocross boots is about safety, performance, and building confidence in young riders. A child's developing feet need boots engineered to absorb impact, stabilize the ankle, and provide control when shifting gears or braking on rough terrain. Ill-fitting boots can cause blisters, restrict mobility, or fail to protect during falls.
At Nelmgerian MX, we understand that parents want their children to ride safely while enjoying the sport. The right boot choice sets the foundation for a positive motocross experience. Motocross involves high-speed riding, jumps, and unpredictable terrain, your child's feet need specialized protection that generic athletic shoes cannot provide. Specialized dirt bike boots offer ankle support, impact-resistant soles, and reinforced toe boxes designed specifically for off-road riding demands.
Measuring Your Child's Foot for Motocross Boots
Accurate foot measurement is the foundation of proper boot selection. Different manufacturers use different lasts, so a youth motocross boot from one brand may fit differently than another.
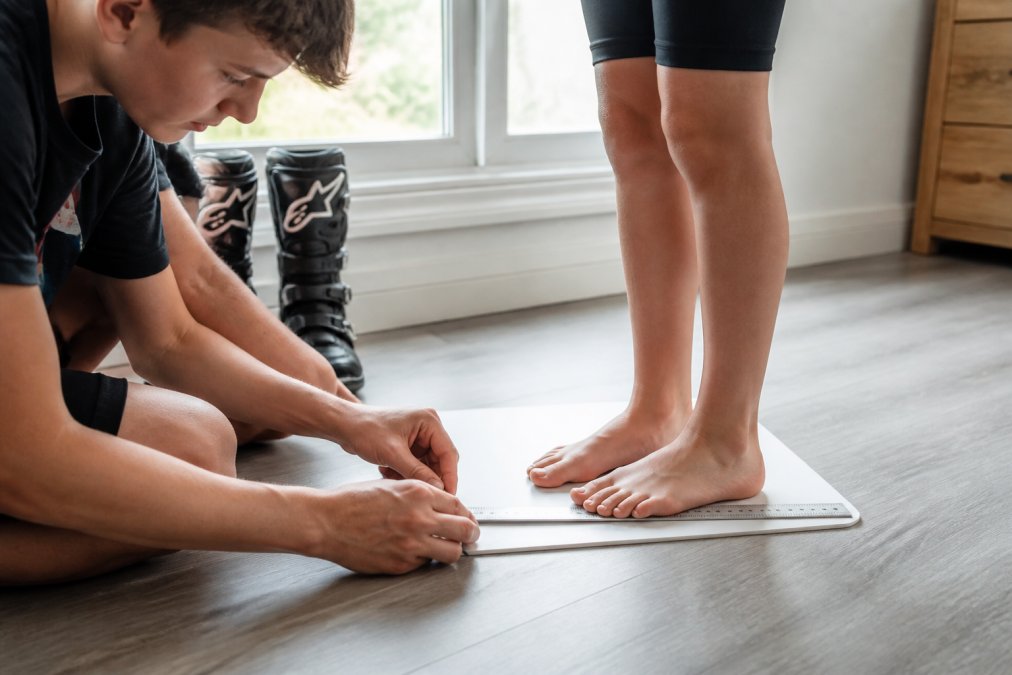
Measure your child's feet at the end of the day when they're slightly swollen from activity. Have your child stand on a flat surface with weight distributed evenly. Place a ruler on the ground and mark where their heel ends and where their longest toe ends. Measure the distance in inches for both feet, as most children have one foot slightly larger than the other. Use the larger measurement when consulting sizing charts.
A common mistake is measuring while the child is sitting down. Feet expand when bearing weight, so a seated measurement will be smaller than the actual boot size needed. Always measure with the child standing.
Understanding Youth Motocross Boot Sizing Charts
Most motocross boot manufacturers provide youth sizing charts that correlate foot length to shoe size and age ranges. However, these charts are guidelines, not guarantees. Children develop at different rates, and two kids the same age may wear completely different sizes.
When consulting a sizing chart, match your child's measured foot length to the corresponding boot size. If your measurement falls between two sizes, choose the larger size, you can add an extra sock layer, but you cannot make a boot smaller.
Growth Room and Sizing Up
A proper-fitting boot should have about a half-inch of space between your child's longest toe and the end of the boot when standing. This allows for natural foot swelling during rides and some growth without the boot becoming dangerously loose.
If your child's foot measurement is right at the edge of a size, sizing up by half a size is reasonable. However, sizing up by a full size is generally a mistake, an oversized boot reduces ankle support and control, increasing injury risk. Young riders need snug ankle contact to feel confident and maintain precise gear-shifting control.
Plan to re-measure your child's feet every few months during periods of rapid growth, particularly in spring and early summer when many kids experience growth spurts.
Key Safety Features and Protection Levels
Understanding key safety features helps you evaluate which boots will best protect your child during falls and impacts.
Ankle Support and Heel Cup Design
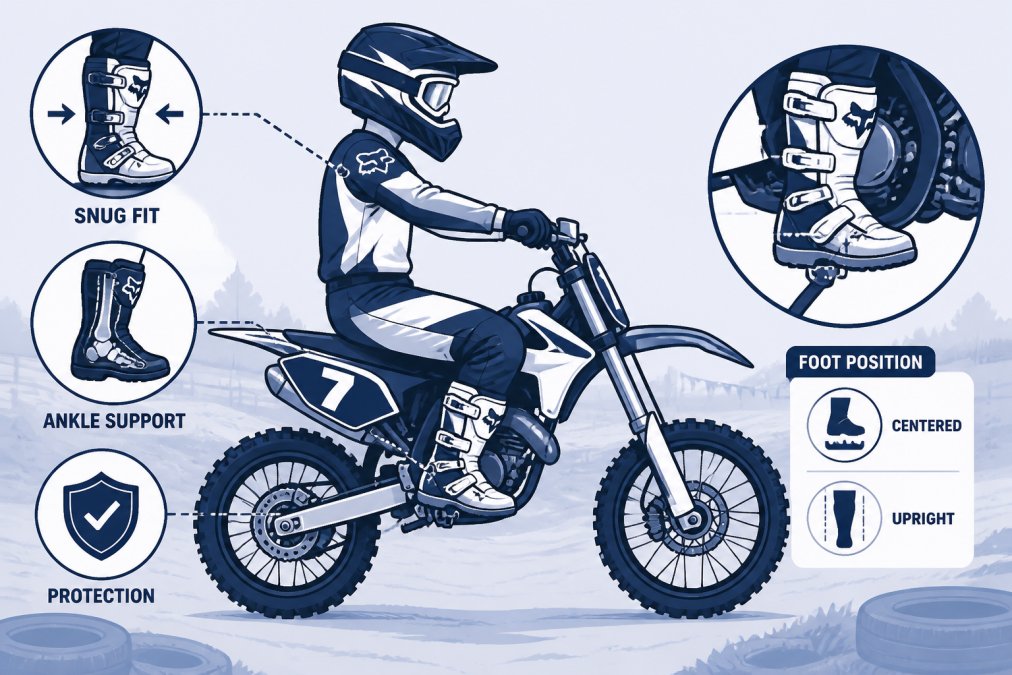
The ankle is the most vulnerable part of a young rider's foot during motocross. Look for boots with reinforced side panels that wrap around the ankle and prevent excessive lateral movement. These panels should be made from synthetic leather or microfiber that provides structure without excessive bulk.
The heel cup is equally important. A deep, contoured heel cup keeps the foot centered in the boot and prevents side-to-side motion. Quality youth motocross boots feature anatomically designed heel cups that match the natural shape of a child's heel, reducing the risk of ankle sprains or fractures during crashes.
Material Durability and Construction
Off-road riding subjects boots to constant abrasion from dirt, rocks, and gear shifting. Most quality youth motocross boots use synthetic leather or microfiber uppers because these materials resist tearing and punctures better than genuine leather and dry faster after wet conditions.
The sole is where durability truly matters. Look for oil-resistant, abrasion-resistant soles made from compounds designed to withstand repeated contact with pegs and shifters. Quality soles typically feature aggressive tread patterns for better grip. Examine seams closely, they should be tight and even with no loose threads or gaps, as poor stitching indicates the boot will fall apart after a season of hard use.
Comfort and Fit Considerations
A boot that protects but causes pain won't be worn. Comfort during the break-in period is crucial for keeping young riders engaged with the sport.
The toe box should be roomy enough that your child's toes aren't cramped, but snug enough to prevent excessive movement. The instep area should feel snug but not restrictive, you should be able to slide one finger between the boot and your child's instep when standing.
Moisture-wicking is often overlooked but matters significantly. Quality youth motocross boots feature moisture-wicking linings that pull sweat away from the skin, reducing blister risk. Some boots include ventilation ports or breathable mesh panels designed to keep feet dry.
How to Break in Dirt Bike Boots Properly
New boots are stiff, which provides protection but requires a proper break-in period. The process typically takes 5-10 rides depending on construction and foot sensitivity.
Start with shorter rides of 30 to 45 minutes on familiar terrain where your child can focus on adapting to the boots. Use moisture-wicking motocross-specific socks, not cotton athletic socks, which retain moisture and increase blister risk. Many riders use slightly thicker socks during break-in to add cushioning and reduce friction.
Between rides, inspect your child's feet for signs of blistering or irritation. Small red areas often develop on pressure points and typically toughen up as break-in continues, but if blistering occurs, take a day or two off to let skin recover. Some experienced riders apply athletic tape or moleskin to blister-prone areas before rides during break-in.
When to Replace Kids Motocross Boots
Watch for these signs of wear: creasing or cracking in the synthetic leather, worn-through areas on the sole (especially around the heel and toe), loose or separated stitching, and deteriorating ankle support that feels mushy or unstable. If the heel cup has compressed so much that your child's foot shifts side-to-side inside the boot, replacement is overdue.
Growth is another factor. If your child's toes are pressing against the end of the boot or if their heel is slipping during rides, the boots no longer fit properly. Most children outgrow youth motocross boots before they wear out, so plan for replacement every 12-18 months depending on growth rate.
After crashes, inspect boots carefully for internal damage that might not be visible from the outside. Compressed foam padding or bent internal structure compromises protection even if the exterior looks intact.
New vs. Used Boots and Making the Right Choice
Budget constraints often lead parents to consider used boots. This choice requires careful evaluation to ensure safety isn't compromised.
New boots offer full structural integrity, uncompressed padding, and manufacturer warranty support. Used boots can be reasonable if inspected thoroughly for cracked materials, worn soles, loose stitching, and heel cup compression. Run your hand inside to feel for internal damage or separated padding.
Ask the seller about the previous rider's size and riding style. Boots used by a heavier or more aggressive rider will show more wear than those used by a lighter or less intense rider. One advantage of used boots is that much of the break-in work is already done.
Consider the cost-to-lifespan ratio. If used boots cost 40% of new boots and last 70% as long, that's reasonable savings. Do the math based on what you find locally.
Choosing the right youth motocross boots keeps your child safe, comfortable, and excited about riding. Proper fit, adequate protection, and regular assessment ensure the boots continue serving their purpose as your child grows. At Nelmgerian MX, we believe that investing in quality gear is investing in your child's confidence and passion for the sport. When young riders feel secure in their equipment, they focus on skill development and enjoying the experience. Visit Nelmgerian MX to explore resources that help your family build a stronger connection to motocross, both on and off the track.
Frequently Asked Questions
How should I measure my child's foot for youth motocross boots?
Have your child stand on a flat surface in socks and measure from the heel to the longest toe using a ruler or measuring tape. Write down the measurement in inches. For the most accurate fit, measure both feet since they may differ slightly. Compare this measurement to the youth motocross boot sizing chart provided by the manufacturer. Always measure in the afternoon when feet are slightly swollen from daily activity, as this gives a more realistic size for riding boots.
How much growth room should I leave when sizing youth motocross boots?
Plan for approximately half an inch to three-quarters of an inch of growth room inside the boot. This allows your child's foot to grow without the boot becoming too loose for proper ankle support and control. However, avoid sizing up too much, as loose boots reduce heel cup contact and ankle stability during off-road riding. A boot that's too large can cause your child's foot to shift inside the boot while gear shifting or braking, creating safety risks and discomfort.
What are the signs that my child's motocross boots need to be replaced?
Replace kids motocross boots when the sole shows significant wear or reduced traction, the heel cup has compressed and no longer supports the ankle properly, the buckle system is broken or won't stay fastened, or synthetic leather and microfiber are cracked or separating. Also replace boots if your child's foot has grown to fill the entire boot with no growth room remaining, or if the toe box shows punctures or material breakdown. Worn-out boots compromise ankle support and impact protection, increasing injury risk during off-road riding.
Should I buy new or used youth motocross boots for my child?
New boots offer full ankle support, intact impact protection, and a reliable break-in period. Used boots may be less expensive but can have compressed heel cups, worn soles, and unknown damage history that reduces protective value. If you choose used boots, inspect the heel cup for compression, check the buckle system for function, and ensure the sole still provides good traction. For safety-critical gear like motocross boots, new is generally the better choice unless you're buying from a trusted source with documented care history.
This article was written using GrandRanker