 how-to
How to Stand on a Dirt Bike Correctly
Table of Contents
- Why Standing on a Dirt Bike Matters
- Understanding the Dirt Bike Attack Position
- Proper Foot Placement and Footpeg Positioning
- How to Grip a Dirt Bike with Your Legs
- Body Weight Distribution and Balance
- Hand and Arm Positioning While Standing
- Dirt Bike Body Position Drills for Muscle Memory
- Common Mistakes to Avoid
Last Updated: August 18, 2026
Why Standing on a Dirt Bike Matters
Standing on a dirt bike correctly fundamentally changes how much control you have over the machine, how efficiently you absorb terrain, and how long you can ride without exhaustion. When seated, the bike does most of the work and your suspension bears the full impact of bumps. Standing changes everything: you become part of the suspension system, your legs absorb shock, your core stabilizes through turns, and your body weight shifts to meet changing terrain demands.
Body positioning is always a top factor in rider progression. A rider with correct standing technique learns faster, builds confidence quicker, and avoids injuries from fighting the bike. This guide breaks down how to stand on a dirt bike correctly, from foundational positioning to practical drills for building muscle memory.
Understanding the Dirt Bike Attack Position
The attack position is the most effective standing posture for dirt bike riding. It's called the "attack" position because it puts you in an aggressive, ready stance with knees bent, weight forward, and body engaged with the bike.
The Neutral Position as Your Foundation
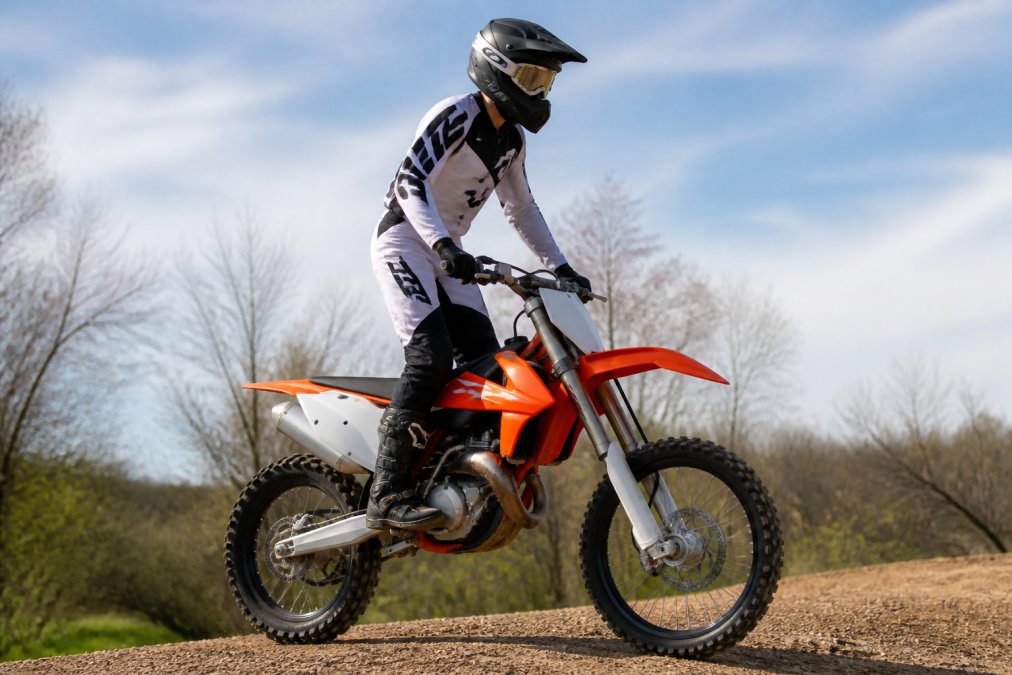
Neutral is where you sit balanced on the bike with legs relaxed and weight centered. Your feet rest flat on the footpegs, hands grip the handlebar with relaxed elbows, and your body is upright. This is your resting position between technical sections.
The neutral position teaches you where the bike's balance point is. When truly neutral, you can feel the bike's center of gravity directly beneath you. Spend time in neutral until it feels automatic, this foundation makes every other position easier to execute.
Transitioning to the Attack Position
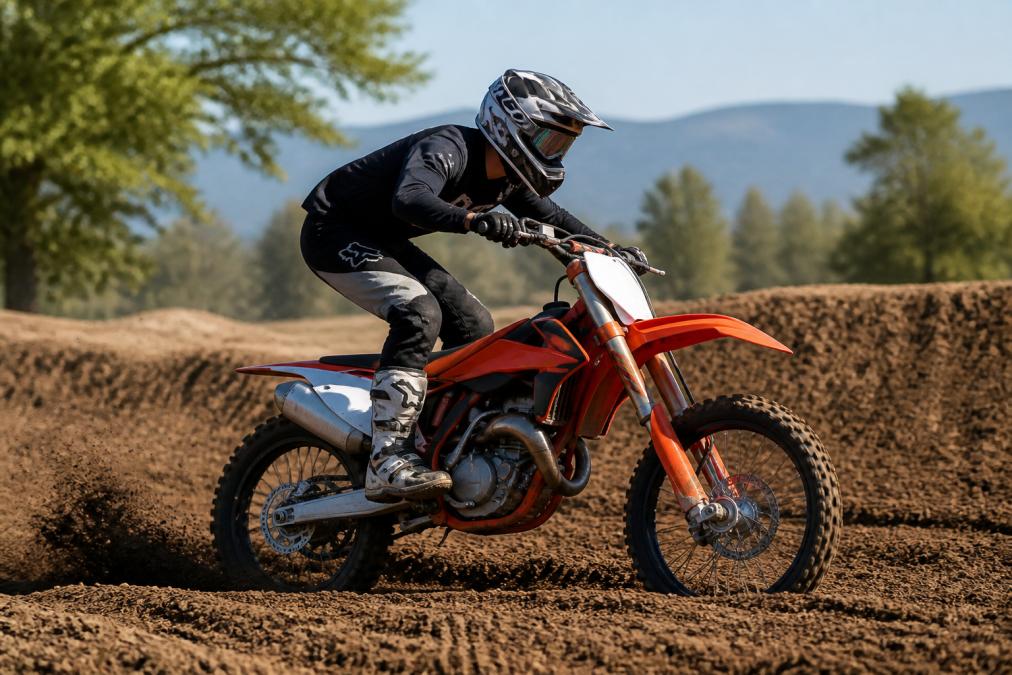
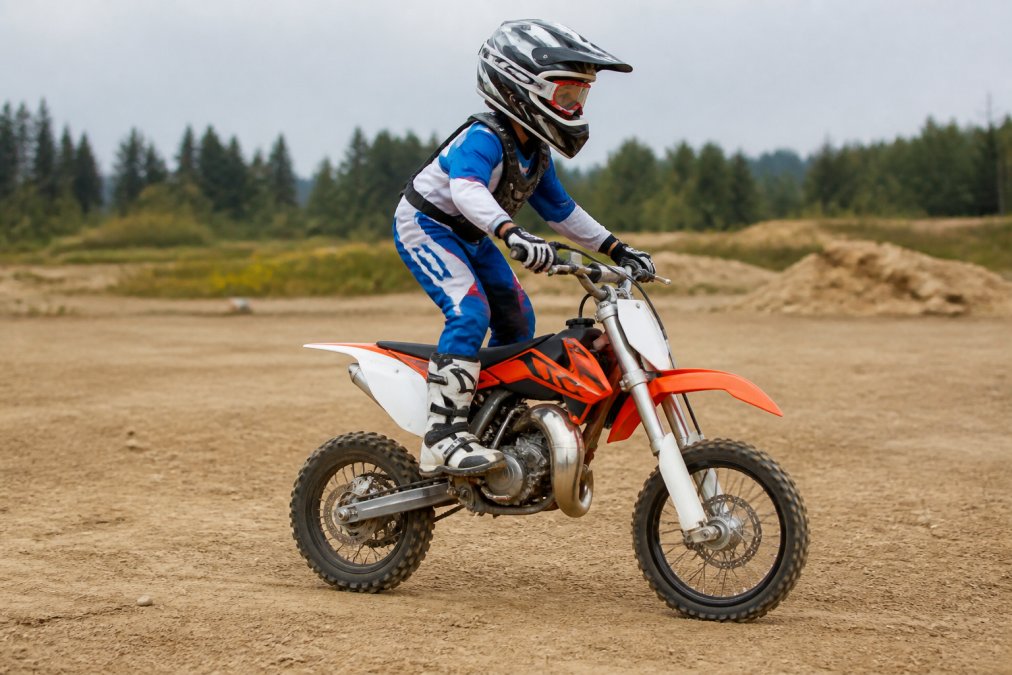
The attack position begins with your feet: toes point slightly downward, heels stay elevated, and weight shifts onto the balls of your feet. Your knees come up and out, ready to grip the bike. Your hips hinge forward at roughly 45 degrees, this is critical. Most riders bend at the waist instead of hinging at the hips, which rounds the lower back and disconnects legs from the bike. Hinging at the hips keeps your core engaged and legs in position to work.
Your elbows rise up and out, creating space between your arms and body. Your core tightens, chest comes forward slightly, and your head stays neutral, looking ahead at the terrain.
Proper Foot Placement and Footpeg Positioning
The ball of your foot, the area just behind your toes, should be your contact point on the footpeg. This positioning gives you mechanical advantage to grip the bike and mobility to adjust weight quickly. Your heel stays elevated and slightly back, creating an ankle angle that allows your calf to engage. Your toes point slightly downward, angling toward the ground, which helps prevent your foot from slipping forward during hard acceleration.
Footpeg height matters significantly. If pegs are too high, you can't get your knees out far enough to grip effectively. If too low, you're cramped and your legs tire quickly. The ideal position has your leg at roughly 90 degrees when your foot is on the peg and your leg is fully extended downward. Many young riders benefit from slightly higher pegs than stock, especially on larger bikes, as this lets them get into attack position more easily.
How to Grip a Dirt Bike with Your Legs
Gripping the bike with your legs stabilizes your upper body, helps you control through turns, and lets you use your legs as suspension.
Squeezing with Your Knees and Inner Thighs
The squeeze comes from your inner thighs and inside of your knees. This grip does three things: stabilizes your upper body, helps control the bike through turns, and lets you use your legs as suspension. Apply steady pressure against the tank, holding your position while allowing your legs to move and absorb impacts. The pressure should feel controlled, not maximum force, over-gripping fatigues your legs quickly and causes you to lose feel for what the bike is doing.
Your knees stay slightly away from the tank, not pressed flat against it. This creates space that lets your knees absorb impacts by bending and straightening.
Using Your Legs as Suspension
Your legs actively absorb impacts and smooth out the ride. When you hit a bump, your knees and hips bend slightly, letting your legs compress and extend, working with the bike's suspension. This requires active engagement, you're not passively waiting for the bike to absorb impacts, but actively working with the suspension and anticipating terrain changes. On smooth sections, your legs stay relatively extended. When terrain gets rough, you increase knee and hip bend, letting your legs do more absorption work.
Body Weight Distribution and Balance
How you distribute your weight determines how the bike responds to your inputs and how much control you have.
Finding Your Center of Gravity
Your center of gravity should be slightly forward of where it is when seated. This forward position gives you better traction on the front wheel and more control in technical sections. In tight, technical sections, you might move weight even further forward, loading the front wheel more heavily. On high-speed sections, you might move slightly back to help the rear wheel maintain traction. Learning to feel and adjust your center of gravity separates good riders from great ones.
Hinging at the Hips vs. Bending at the Waist
Hinging at the hips means your entire torso moves forward as a unit, with the bend happening at your hip joint. Your lower back stays relatively neutral and your core stays engaged. Bending at the waist means your spine is flexing, your lower back is rounding, and your core is disconnected from your legs.
When you hinge at the hips, your legs and upper body work together as an integrated unit. Your core muscles engage to support the movement, and your legs can grip effectively. When you bend at the waist, your upper body disconnects from your legs, your core disengages, and your grip becomes weak and unstable.
Hand and Arm Positioning While Standing
Your elbows should be up and out, creating roughly a 90-degree angle between your upper arm and forearm. This gives you leverage on the handlebar and lets your shoulders move independently of your upper body. Many riders drop their elbows down, which reduces leverage and forces shoulders to move with arms.
Your grip on the handlebar should be firm but not tense. You're holding the bar, not strangling it. Tension travels up through your shoulders and into your neck, fatiguing you and reducing your ability to feel what the bike is doing. A relaxed grip is actually more effective because it lets you make fine adjustments without overworking.
Your wrists stay relatively neutral, not bent up or down. This neutral position lets you modulate throttle and clutch smoothly. When gripping with your legs, your arms should stay relatively relaxed. When you need to pull hard on the handlebar in a tight turn, your leg grip might ease slightly to allow your upper body to move.
Dirt Bike Body Position Drills for Muscle Memory
Understanding the correct position is one thing. Building muscle memory to execute it consistently is another.
Drill 1: Stationary Balance Practice
Start with the bike stationary on a stand or held by a friend. Mount the bike and practice transitioning from neutral to attack position and back slowly and deliberately, focusing on each component: feet position, knee angle, hip hinge, elbow position, core engagement. Spend 5-10 minutes doing these transitions. Once transitions feel smooth, practice holding attack position for 30-60 seconds at a time.
Drill 2: Low-Speed Maneuvers
Move to the bike at very low speed. Walk the bike forward while standing in attack position, then progress to slow idle speed. Practice figure-eights at low speed, focusing on maintaining attack position through turns. Practice stopping and starting while standing. This typically takes 15-20 minutes. Don't progress until low-speed maneuvers feel comfortable and you can maintain attack position without thinking about it.
Drill 3: Progressive Terrain Challenges
Start on smooth, flat terrain and practice standing through gentle sections. Once smooth terrain feels solid, progress to slightly rougher ground, then small hills, then more technical sections. The progression is gradual, you're slowly increasing demands on your body and ability to maintain correct positioning under stress.
Common Mistakes to Avoid
Gripping too hard is the most common mistake. More pressure doesn't equal more control, it creates tension, fatigues your legs, and reduces your ability to feel the bike.
Bending at the waist instead of hinging at the hips disconnects your upper and lower body and strains your lower back. Check your hip hinge constantly, especially as you fatigue.
Keeping your elbows down reduces your leverage and creates shoulder tension. Elbows up and out is non-negotiable for control.
Feet positioned incorrectly on the pegs undermines everything else. Your feet must be on the ball of your foot with heels elevated for effective leg grip.
Moving your center of gravity too far forward or back for the terrain takes practice to feel, but paying attention to how the bike responds helps you learn the right balance point.
Tensing your grip on the handlebar creates fatigue and reduces smooth adjustments. A relaxed grip is more effective.
Inconsistent practice is the biggest mistake. Body position becomes automatic only through repetition. Practicing twice a week for four weeks beats practicing once a week for eight weeks.
Learning to stand on a dirt bike correctly is one of the most fundamental skills you can develop. It changes how you interact with the bike, how much control you have, and how enjoyable riding becomes.
Nelmgerian MX creates rider training journals and educational resources specifically designed to help young riders track their progress and build confidence in their skills. Whether you're working on body position, throttle control, or overall technique, having a structured way to document your practice and see improvement over time keeps young riders engaged and motivated. The combination of proper instruction and consistent tracking accelerates skill development significantly.
Frequently Asked Questions
What is the correct body position for standing on a dirt bike?
The attack position combines several key elements: knees bent and gripping the bike, body hinged at the hips (not the waist), elbows up and out, and weight distributed through your feet on the footpegs. Your center of gravity should stay over the bike's pivot point, with your core engaged for stability. This position gives you the best leverage, balance, and control across different terrain and riding conditions.
Why is standing up on a dirt bike important for balance?
Standing raises your center of gravity and moves your weight forward, improving traction and allowing your bike's suspension to work more effectively. When standing, your legs absorb bumps and impacts instead of the seat, keeping the bike planted on the ground. This gives you better control over the bike's movement and helps you maintain momentum through rough sections. Young riders who master standing position develop stronger bike control and confidence faster.
How do I keep my weight centered while standing on a dirt bike?
Focus on hinging at your hips rather than bending at your waist. Keep your elbows up and slightly forward, and grip the bike firmly with your knees and inner thighs. Your weight should transfer through your feet on the footpegs, with your core muscles engaged to stabilize your upper body. Practice on flat ground at low speeds to build muscle memory, then gradually increase speed and terrain difficulty as you become comfortable with the position.
What are the common mistakes when standing on a dirt bike?
Riders often lock their knees instead of keeping them bent, which reduces suspension absorption and stability. Gripping with only the calves instead of the full leg and inner thigh reduces control. Bending at the waist instead of hinging at the hips throws off your center of gravity. Keeping elbows too low limits leverage and control. Tension in the shoulders and arms reduces your ability to feel the bike. Start with drills on stationary bikes or at very low speeds to break these habits before they become ingrained.
This article was written using GrandRanker