 blog
blog
How to Structure Kids Motocross Practice: A Parent's Guide
Table of Contents
- Why Structured Practice Matters for Young Riders
- How to Structure Kids Motocross Practice: The Foundation
- Progressive Riding Drills for Skill Development
- Safety Gear and Protective Equipment Checklist
- Building Strength and Endurance for Young Motocross Riders
- Post-Practice Recovery and Debriefing
- Budget-Friendly DIY Training Aids and Track Setup
- Coaching Tips for Parents: How to Support Your Motocross Kid
- Frequently Asked Questions
How to Structure Kids Motocross Practice: A Parent's Guide
Last Updated: July 27, 2026
Why Structured Practice Matters for Young Riders
Young riders who follow a deliberate, progressive training plan develop fundamental skills faster, build confidence more reliably, and stay safer on the track. The difference between a child who rides randomly and one who trains with intention shows up within weeks. Purposeful practice builds muscle memory, improves throttle control, and teaches body positioning in a logical sequence that prevents repeated mistakes.
Structure also reduces injury risk. When practice progresses from slow-speed drills to more technical challenges, young riders develop the physical and mental foundation to handle faster speeds safely. A child who understands throttle control and body positioning before attempting jumps is far less likely to lose control.
How to Structure Kids Motocross Practice: The Foundation
The foundation rests on three pillars: age-appropriate progression, consistent session structure, and measurable skill development. Start by establishing your child's current skill level, can they control the throttle smoothly? Do they understand body positioning through corners? Once you know their baseline, you can build a progression that creates real progress.
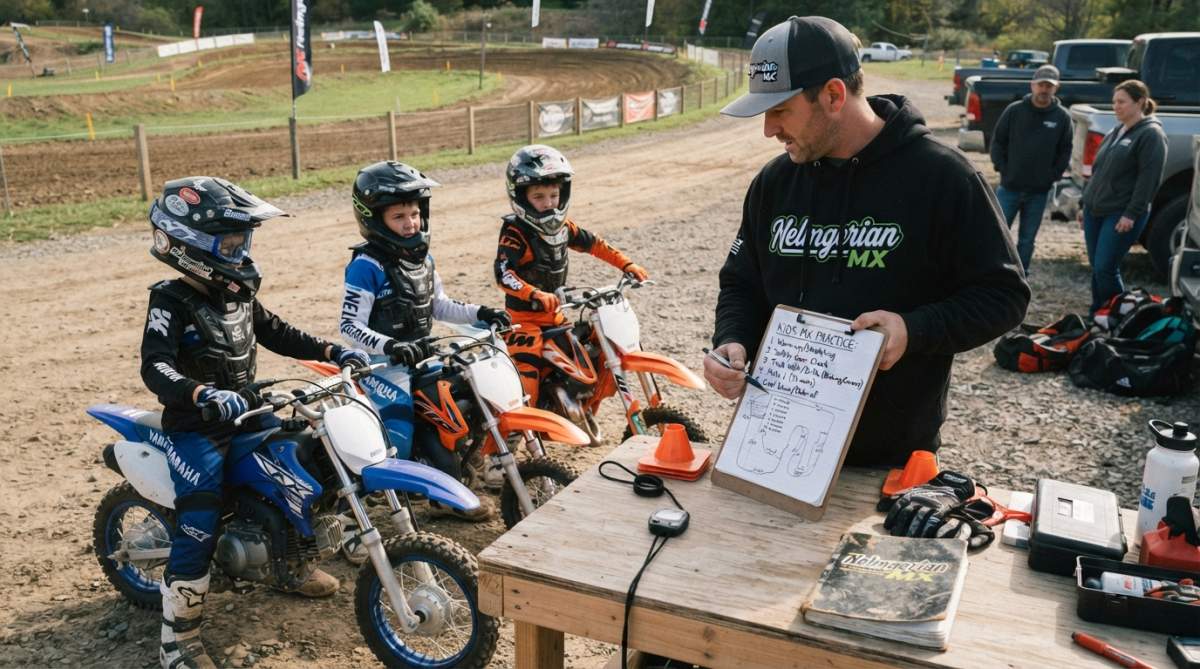
A well-structured practice session includes a warm-up phase, focused skill work, and cool-down reflection. The warm-up prepares the bike and rider. The skill work targets one or two specific techniques. The cool-down gives you a chance to discuss what worked and what needs adjustment. This rhythm, repeated consistently, creates rapid improvement.
Age-Specific Practice Schedules
For riders ages 4-6 on 50cc bikes, focus on bike familiarity and basic throttle control. Sessions should be 20-30 minutes because attention spans are limited. Practice twice per week. The goal is building comfort with the machine and establishing safe habits.
For riders ages 7-9 on 70cc or 85cc bikes, extend sessions to 30-45 minutes of focused work. Introduce figure-eights, basic cornering technique, and throttle modulation drills. Practice three times per week. Kids at this age develop the foundation movements that carry them through advanced riding.
For riders ages 10-13 on 125cc bikes, sessions can run 45-60 minutes with more complex drills. These riders can handle instruction about body positioning, braking technique, and progressive speed increases. Practice three to four times per week. Kids at this level benefit from mental preparation work and post-practice debriefing.
For riders 14 and up, practice sessions extend to 60-90 minutes with high-intensity skill work and strength conditioning integrated. Four to five sessions per week is common for serious young riders at this level.
Session Length and Frequency
Quality matters more than quantity. A focused 30-minute session where your child works on one skill beats a two-hour ride of casual cruising.
For younger riders (ages 4-8), two to three sessions per week of 20-45 minutes each is optimal. This frequency builds consistency without creating fatigue or boredom.
For intermediate riders (ages 9-12), three to four sessions per week of 45-60 minutes each creates steady progression while allowing recovery time between sessions.
For advanced young riders (ages 13+), four to five sessions per week of 60-90 minutes each is standard for serious competitors.
Frequency matters more than length. A child who practices three times per week for 45 minutes will progress faster than one who practices once per week for two hours.
Progressive Riding Drills for Skill Development
Progressive drills are the engine of skill development. They start simple and build in complexity, allowing your rider to master one element before adding the next. The progression should follow: foundation movements first, then cornering and body positioning, then one-handed riding and advanced techniques.
Foundation Movements and Throttle Control
Throttle control is the first skill to lock in. Everything else, cornering, braking, jumping, depends on smooth, predictable throttle input.
Start with the throttle roll drill. Have your child ride in a straight line and practice rolling the throttle open slowly, holding it steady for five seconds, then rolling it closed slowly. The goal is smooth, progressive input with no jerky movements. Repeat for 10-15 minutes per session until it becomes automatic. Most kids need three to four sessions before this feels natural.
Once throttle roll is solid, introduce throttle modulation in turns. Have your child ride a large circle at slow speed and practice maintaining steady throttle while leaning. This teaches that lean angle and throttle input are separate controls. Expect five to eight sessions before your rider is smooth.
The one-foot-down drill helps with balance and throttle control at low speeds. Have your child ride slowly in a straight line with one foot dragging on the ground. This forces them to use throttle and body position to stay balanced. Start with 50 feet, then extend to 100 feet.
Figure Eights and Cornering Technique
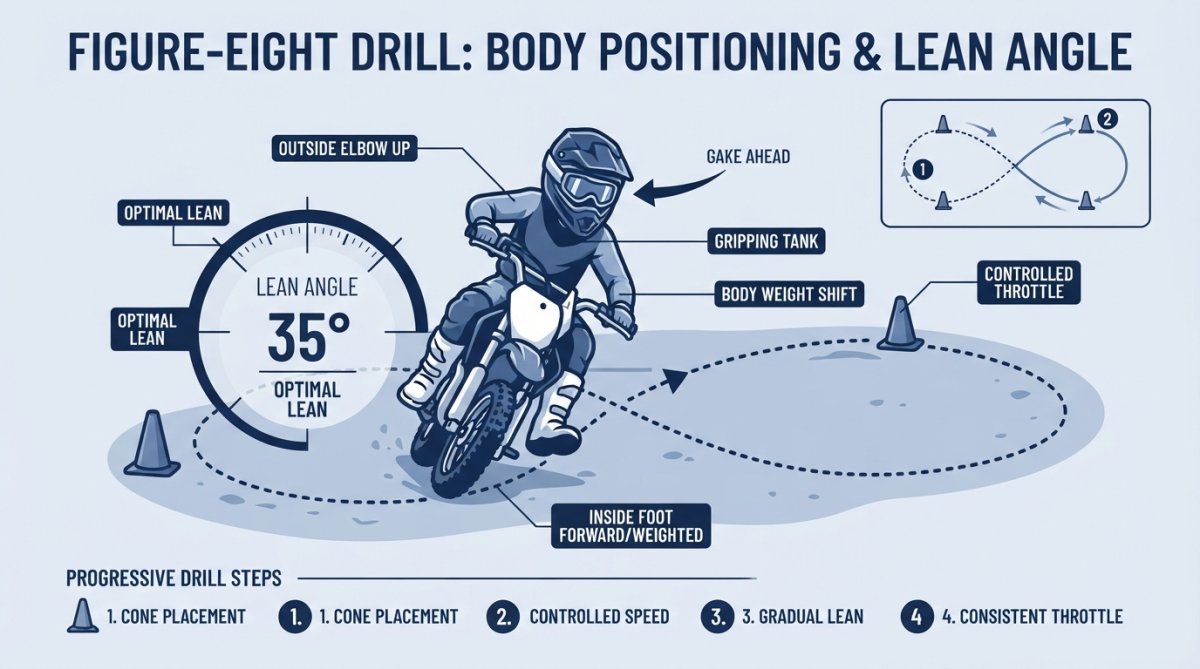
Figure-eights are the cornerstone of cornering practice. Set up two cones about 30 feet apart and have your child ride a figure-eight pattern around them. Start slow, focusing on smooth, controlled turns with consistent lean angle.
Progression for figure-eights:
- Slow figure-eights (5-10 mph) focusing on smooth steering
- Moderate speed (15-20 mph) maintaining throttle through the turn
- Tighter circles to increase lean angle
- Speed increases while maintaining control and body position
Most riders need four to six sessions before they're smooth. Body positioning in corners is critical: inside elbow up, outside leg extended, head over the inside of the bike, eyes looking to the exit. Introduce one body position cue per session.
One-Handed Riding and Advanced Body Positioning
One-handed riding teaches body control and improves balance. Start with one-handed riding at walking speed in a straight line for 50 feet. Have your child ride with the right hand only, then switch to the left hand only.
Once walking speed feels solid, increase to 10-15 mph. At this speed, one-handed riding becomes noticeably harder because the bike is less stable. Your child's core muscles and legs have to work harder to maintain balance.
Progress to one-handed cornering only after straight-line one-handed riding is solid. Have your child ride a large circle with one hand at slow speeds and gradual lean angles.
Safety Gear and Protective Equipment Checklist
Safety gear is non-negotiable. Before your child gets on the bike for any practice session, ensure they're wearing all required gear.
Essential protective equipment:
- DOT or ECE-certified helmet (full-face recommended for motocross)
- Goggles (must fit under the helmet, replace lenses when scratched)
- Jersey (motocross-specific)
- Pants (motocross-specific with reinforced areas)
- Gloves (protect hands and wrists)
- Boots (ankle support and shift pad protection)
- Chest protector (optional but recommended)
- Knee/shin guards (critical for protecting lower legs)
- Neck brace (optional, reduces neck strain)
Replace gear when it shows wear. A helmet that's taken a hard impact should be replaced even if it looks fine. Fit matters, gear that's too loose won't protect properly; gear that's too tight restricts movement.
Building Strength and Endurance for Young Motocross Riders
Motocross is physically demanding. Young riders need core strength, grip strength, leg endurance, and cardiovascular fitness.
Physical Conditioning Exercises
Core strength stabilizes the rider on the bike and reduces fatigue. Planks, dead bugs, and bird dogs are excellent core builders. Start with 20-30 second planks and progress to 60+ seconds. Do three sets, two to three times per week.
Grip strength matters for controlling the throttle. Have your child squeeze a grip trainer or hang from a pull-up bar. Start with 30 seconds and work up to 60+ seconds.
Leg strength and endurance support proper body positioning through multiple laps. Squats, lunges, and wall sits build leg strength. Do three sets of 10-15 reps, two to three times per week.
Cardiovascular fitness prevents fatigue from affecting technique. Riding practice itself builds cardiovascular fitness, but supplementing with running, cycling, or swimming accelerates improvement. Aim for 20-30 minutes of moderate cardio three times per week.
Flexibility and mobility prevent injury and improve body positioning. Have your child do dynamic stretching before practice and static stretching after, focusing on hip flexors, hamstrings, shoulders, and ankles.
Mental Preparation and Focus Techniques
Mental preparation is as important as physical conditioning. Visualization is powerful, have your child visualize a specific drill or corner before riding it. Spend 2-3 minutes on visualization before practice sessions.
Breathing techniques calm the nervous system and improve focus. Teach your child to take slow, deep breaths: inhale for a count of four, hold for four, exhale for four.
Goal-setting gives practice direction. Instead of "practice today," set a specific goal: "I'm going to nail five smooth figure-eights in a row."
Post-practice reflection cements learning. After each session, spend five minutes discussing what went well and what needs work. Ask your child what they noticed about their riding.
Post-Practice Recovery and Debriefing
Recovery happens after the bike is parked. Young riders need physical recovery (rest, hydration, nutrition) and mental recovery (reflection, celebration of progress).
Have your child drink water and eat a light snack with carbs and protein within 30 minutes of finishing. A banana with peanut butter or a protein smoothie works well.
Stretching after practice reduces soreness and improves flexibility. Have your child do 10-15 minutes of static stretching focusing on hip flexors, hamstrings, shoulders, and forearms.
Debriefing is where learning gets locked in. Ask your child specific questions: What felt good? What was difficult? What do you want to work on next time? Celebrate progress, even small wins. Balance feedback with recognition of improvement.
Recovery days are important. Young bodies need rest to adapt to training stress. If your child practices four times per week, ensure they have at least two or three complete rest days where they're not riding.
Budget-Friendly DIY Training Aids and Track Setup
You don't need expensive equipment or a professional track to run effective practice sessions.
Building a Backyard Practice Track
A backyard practice area doesn't need to be large. Even 100 feet by 50 feet provides enough space for productive drills. Clear the area of rocks, roots, and debris, and compact the soil as much as possible.
Create basic features with minimal cost:
- Cones: Use PVC cones or orange traffic cones ($3-5 each) for figure-eights, straight-line drills, and cornering practice.
- Whoops: Build small bumps using dirt, 12-18 inches tall and spaced 6-8 feet apart.
- Berms: Bank corners slightly (10-15 degrees) to help young riders understand lean angle and body positioning.
- Straightaway: Dedicate a section for straight-line drills and keep it smooth and predictable.
Maintenance is minimal. Rake out ruts and holes periodically. If the track gets hard and slick, water it lightly to restore traction.
Low-Cost Training Tools and Obstacles
Cones and markers ($0.50-2 each): Use these to define drills and mark corners. You need at least 8-10.
Rope or chalk lines ($5-10): Mark straight lines on the ground for throttle control drills.
Homemade ramps ($20-50): Build simple wooden ramps for introducing jumping. Start small, 12-18 inches, and progress gradually.
Stopwatch or phone timer (free): Time your child's laps or drills for objective feedback.
Video camera or phone (free): Record practice sessions. Watching video helps young riders see what they're actually doing versus what they think they're doing.
Coaching Tips for Parents: How to Support Your Motocross Kid
Your role as a parent goes beyond driving to the track. You're also a coach, mentor, and emotional support system.
Learn the basics yourself. You don't need to be an expert rider, but understanding throttle control, body positioning, and cornering principles helps you give better feedback.
Give feedback that's specific and actionable. Instead of "You're not leaning enough," try "Try moving your inside elbow up and hanging off the seat more in that left turn."
Avoid comparing your child to others. Every rider progresses at their own pace. Comparing breeds discouragement.
Celebrate effort and improvement, not just results. If your child worked hard on throttle control and showed improvement, that's worth celebrating.
Manage your own emotions. Kids pick up on parental stress and anxiety. Stay calm, encouraging, and patient.
Balance structure with fun. Drills are important, but so is free riding where your child just cruises around and enjoys the sport.
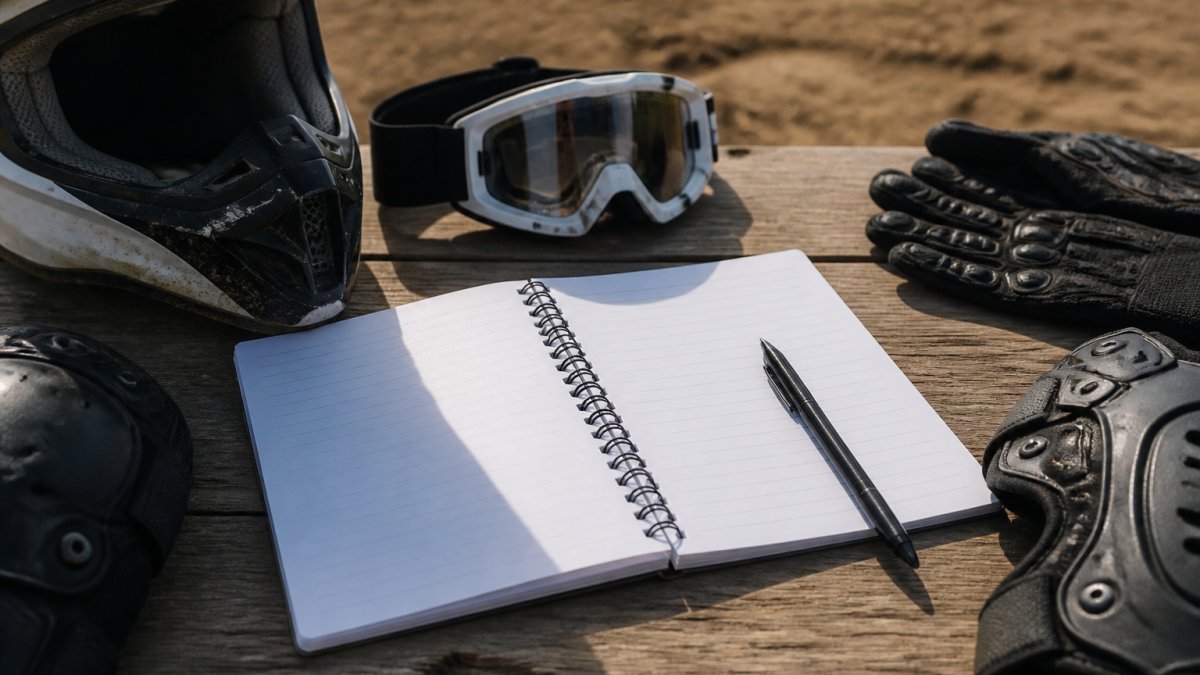
Nelmgerian MX has created rider training journals specifically designed to help young riders track progress, set goals, and build confidence between practice sessions. These journals complement structured practice by giving your child a tool to reflect on their riding and take ownership of their improvement. Combined with the practice structure outlined here, training journals help young riders develop both skills and the mental resilience that separates good riders from great ones.
Structured practice transforms motocross from a recreational activity into a skill-building journey where young riders see measurable progress. The framework outlined here, age-appropriate scheduling, progressive drills, safety-first conditioning, and thoughtful coaching, creates the conditions for your child to develop as a rider and as a person. Start with foundation movements, build consistency through regular practice, and celebrate the small wins along the way.
Frequently Asked Questions
What's the best way to structure kids motocross practice for beginners aged 5-7?
For 5-7 year olds on 50cc bikes, keep practice sessions to 20-30 minutes, 2-3 times per week. Focus on throttle control basics, simple figure eights, and getting comfortable with the bike. Prioritize fun and confidence-building over complex drills. Always include safety gear checks and warm-up time. Break sessions into 5-10 minute segments with short rest periods to match their attention span.
How often should young riders practice motocross to see improvement?
Consistent practice beats occasional long sessions. Younger riders (5-10) benefit from 2-3 shorter sessions per week, while older kids (11+) can handle 3-4 sessions weekly. Progressive drills and skill progression require regular repetition. Post-practice debriefing helps reinforce what they learned. Quality focused practice time matters more than total hours on the bike.
What safety gear do kids need before starting structured motocross practice?
Essential protective equipment includes a DOT-approved helmet, goggles, jersey, gloves, pants, boots, and body armor. Chest protectors and knee guards add extra protection during progressive drills. All gear should fit properly, ill-fitting equipment reduces protection and comfort. Check gear before every session and replace damaged items immediately. Proper safety gear builds confidence and prevents injuries during skill development.
Can I build a practice track in my backyard for kids motocross training?
Yes, a backyard practice track is a budget-friendly option. Start with a small area (50x100 feet minimum), add simple obstacles like berms, jumps, and figure-eight markers using dirt or sand. Ensure proper drainage and compact the surface. DIY training aids like cones, PVC pipes, and wooden ramps help young riders work on throttle modulation and cornering technique. Always check local regulations before building.
This article was written using GrandRanker