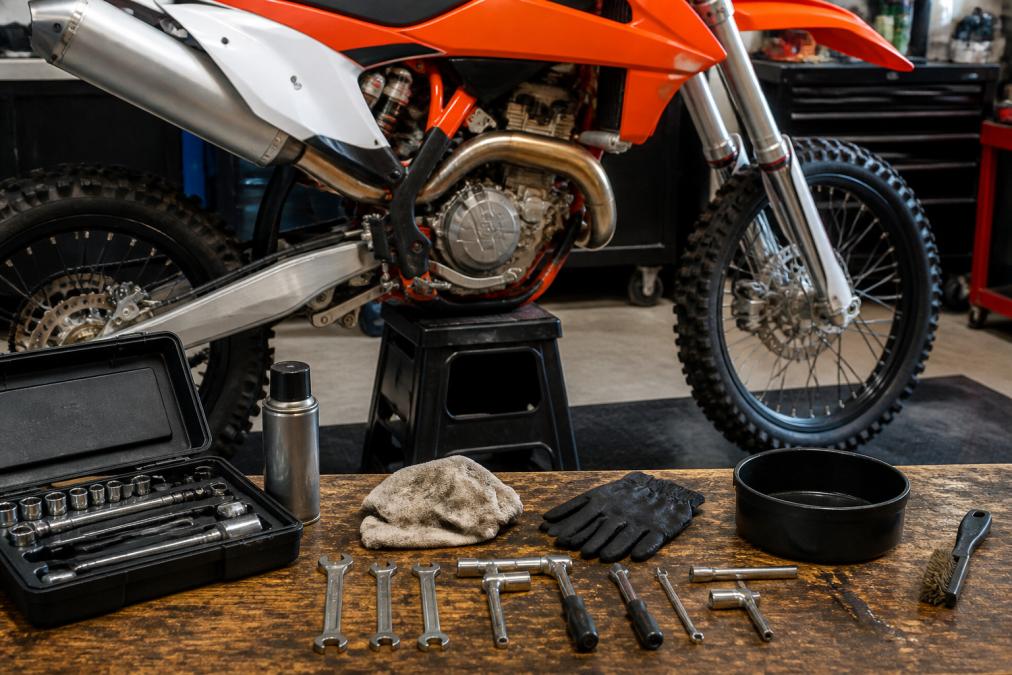
 ultimate-guide
Essential Tools for Dirt Bike Maintenance in 2026
Table of Contents
- Why the Right Tools Make Dirt Bike Maintenance Easier
- Basic Dirt Bike Repair Tools for Your Garage
- How to Change Dirt Bike Oil: Tools and Steps
- Trailside Emergency Repair Kits vs. Garage Tool Kits
- Essential Metric Socket Sets and Tire Maintenance Gear
- A Dirt Bike Maintenance Checklist for Beginners
- Tool Quality Tiers and Tool Maintenance
- Conclusion: Build Your Kit and Ride With Confidence
- Frequently Asked Questions
Last Updated: September 7, 2026
Why the Right Tools Make Dirt Bike Maintenance Easier
Dirt bike maintenance is about safety, reliability, and getting the most out of every ride. Having the essential tools for dirt bike maintenance on hand transforms guesswork into a satisfying garage session. The right equipment prevents stripped fasteners, overlooked wear, and costly shop trips.
Buying a generic automotive toolkit is a mistake. Dirt bikes use metric fasteners almost exclusively, and their lighter bolts are easier to damage than car components. This guide from Nelmgerian MX separates the non-negotiables from the nice-to-haves.
Below, we show you how to build a kit for routine oil changes, chain adjustments, and trailside emergencies.
Basic Dirt Bike Repair Tools for Your Garage
Your home garage deserves a dedicated set of tools. These basic dirt bike repair tools form the foundation for everything from changing a tire to replacing a clutch lever. You do not need a full workshop, but you need quality on the fasteners that hold your bike together.
Metric Sockets and Drive Size Basics
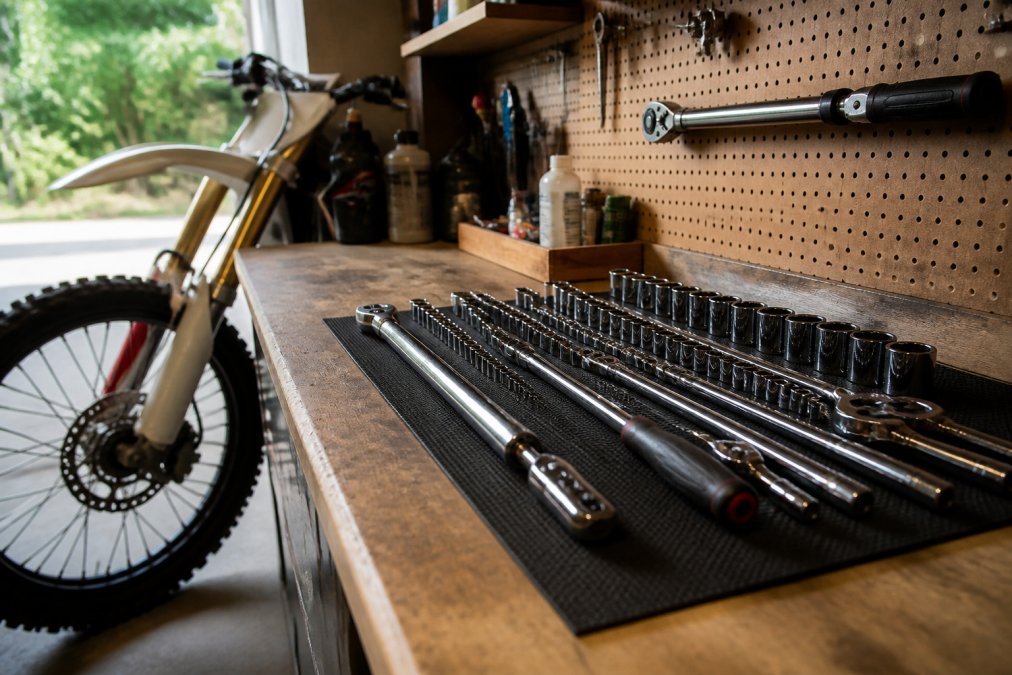
Dirt bikes are metric, so your socket set must be too. A 3/8-inch drive set is the sweet spot for most maintenance, offering enough use for engine and suspension bolts without the bulk of a 1/2-inch drive. You will want a range covering 8mm to 19mm sockets, including deep sockets for spark plugs and longer studs.
Do not skip the smaller sizes. A 10mm socket is the most-used tool in any dirt bike garage, followed by 8mm and 12mm. Choose six-point sockets over twelve-point; they grip better and are less likely to round off a bolt. Add hex bits and a T-handle wrench for recessed fasteners.
Torque Wrench Importance for Fasteners
A torque wrench is not optional. Over-tightening stretches bolts and cracks cases, while under-tightening lets vibration loosen critical parts. It is the difference between a bike that stays tight and one that sheds hardware on the trail.
For dirt bike maintenance, a 3/8-inch drive torque wrench covering 10 to 60 foot-pounds handles most fasteners. Always consult your owner's manual for exact specifications. This precision is even more critical when working on a bike for a young rider.
How to Change Dirt Bike Oil: Tools and Steps
Changing the oil is the single most important routine task, and it requires surprisingly few tools. Here is the exact process, along with the tools that make it foolproof.
Tools You Will Need
- Drain pan: A low-profile pan with a spout makes pouring old oil into a container for recycling much cleaner. Look for one that holds at least 3 quarts.
- Socket or wrench for drain bolts: Most bikes use a 12mm or 14mm bolt for the frame and engine drains. A 6-point socket on a 3/8-inch drive ratchet is best to avoid stripping.
- Oil filter wrench: If your bike uses a cartridge filter (common on KTM, Husqvarna, and newer Yamahas), you will need a cap-style wrench that fits the filter housing. A strap wrench works in a pinch but can slip.
- Torque wrench: Set to the manufacturer's specification for the drain bolts, usually between 10 and 15 foot-pounds. Over-tightening strips the threads in the aluminum cases.
- New crush washers: These are one-time-use. Reusing an old one is the leading cause of a slow oil leak. Buy a pack of 10 in the correct size (often 12mm or 14mm) for less than $10.
- Correct oil: Check your owner's manual for the exact weight and capacity. Most modern four-strokes use 10W-40 or 10W-50, but some require a specific JASO MA rating for wet clutch compatibility.
Step-by-Step Process
- Warm up the engine: Run the bike for 3-5 minutes. Warm oil flows faster and carries more suspended contaminants out with it. Do not do this on a cold engine.
- Position the drain pan: Place it under the frame drain bolt first (if your bike has one), then the engine drain bolt. Some bikes only have one drain point.
- Remove the bolts: Use your socket to break them loose, then remove them by hand. Watch for the crush washer, it may stick to the bolt or the case.
- Let it drain completely: Wait at least 5 minutes. Tilt the bike side-to-side if it is on a stand to help evacuate old oil from the frame.
- Remove the oil filter: For cartridge filters, use the cap wrench. For spin-on filters, a filter wrench is needed. Drain any residual oil from the filter housing.
- Install the new filter: Lightly coat the new filter's O-ring with fresh oil to ensure a proper seal. Screw it in by hand until snug, then give it a quarter turn with the wrench. Do not over-tighten.
- Replace the drain bolts: Install new crush washers and torque the bolts to spec. A common mistake is using the torque wrench to tighten the bolt without a new washer, which can lead to leaks.
- Fill with fresh oil: Use a funnel to pour in the manufacturer's recommended amount. Do not dump the whole bottle in at once; add most of it, then check the level.
- Check the level: Run the engine for one minute, let it sit for two, then check the sight glass or dipstick. The level should be at the top of the mark. Add small amounts if needed.
Common Mistakes to Avoid
- Skipping the crush washer replacement is the most common cause of a weeping drain bolt.
- Using the wrong oil weight can cause clutch slippage or poor shifting in wet-clutch bikes.
- Over-tightening the drain bolt strips the threads in the case, turning a 20-minute job into a $500 case replacement.
- Forgetting to check the level after a test run, the oil pump needs to fill the filter and galleries before you get an accurate reading.
This is a 20-minute job that keeps your engine alive. If you are teaching a young rider responsibility, having them help with this task builds good habits early. The Nelmgerian MX training journal is a great place for them to log their first oil change and track their bike's maintenance history.
Trailside Emergency Repair Kits vs. Garage Tool Kits
Do not pack your entire garage toolkit for a trail ride. Trailside kits fix the most common failures quickly with minimal weight, getting you and your bike back to the truck under your own power.
A trail kit focuses on a flat tire, a broken or loose chain, and a damaged lever. Your garage kit holds the heavier tools for deeper service like suspension work and top-end rebuilds.
Tool Weight and Portability Optimization
Weight is your enemy on the trail. Carry a small selection of combination wrenches instead of a full socket set. A multi-tool with a chain breaker, spoke wrenches, and hex sizes can replace several individual tools.
You only need two lightweight tire irons and a bead buddy. A compact pressure gauge and a small pump or CO2 inflator are non-negotiable. Leave the torque wrench at home; a snug fit by feel is acceptable on the trail, but re-torque everything back in the garage.
Essential Metric Socket Sets and Tire Maintenance Gear
Tire maintenance is a fact of life for dirt bike owners. The essential metric socket sets double as the primary tools for wheel removal. You will need the correct socket for your axle nuts, often 22mm, 24mm, or 27mm.
Beyond sockets, you need two or three tire irons, a bead buddy, and a way to inflate the tire quickly. Cheap, flexible irons bend and make the job twice as hard. Spend more on stiff, forged irons.
Spoke Wrench Usage and Chain Adjustment Tools
Loose spokes cause wheel damage and unsafe handling. A spoke wrench lets you tighten nipples to true the wheel. Tap each spoke; a loose one makes a dull thud, while a tight one rings clearly.
Chain adjustment requires a socket for the axle nut, a wrench for the adjuster bolts, and a ruler or caliper to measure slack. Too tight damages the countershaft seal; too loose can derail. Measure at the tightest point and adjust both sides evenly.
A Dirt Bike Maintenance Checklist for Beginners
A simple checklist keeps you on track. The core principle is to inspect before you ride and service on a schedule:
- Before every ride: check tire pressure, chain slack, and look for loose fasteners.
- After every ride: clean the air filter and inspect it for tears or excessive dirt.
- Every 2-3 rides: clean and lube the chain.
- Every 5-10 hours: change the engine oil and oil filter.
- Every season: inspect the brake pads, spokes, and steering head bearings.
Maintenance Intervals for Specific Components
Different components have different lifespans. The air filter needs attention most often, especially in dusty conditions. The chain and sprockets wear together, so replace them as a set. Inspect brake pads whenever you have the wheel off.
A common mistake is assuming that if it looks fine, it is fine. Rubber components like tires and suspension seals degrade with age, not just use. Check the date code on your tires and inspect the fork seals for oil leaks regularly. Keeping a log of your maintenance intervals in a Nelmgerian MX Training Journal helps you spot patterns and ensures nothing gets forgotten between rides.
The Hour Meter: Your Best Maintenance Tool
The single best investment for a new owner is a $20 hour meter. Dirt bike maintenance is driven by engine hours, not calendar days. Two riders on the same bike with different monthly hours have completely different maintenance schedules.
An hour meter mounts near the spark plug or wiring harness and tracks engine run time automatically, so you can follow a precise schedule:
- Every 5 hours: Clean and oil the air filter. In dusty conditions, do this every ride.
- Every 10 hours: Change the engine oil and oil filter. This is the single most important interval for engine longevity.
- Every 20 hours: Check and adjust valve clearance. This is a top-end check that catches problems before they become expensive.
- Every 30 hours: Replace the piston and rings on high-performance two-strokes. Four-strokes can go longer, but check the owner's manual.
- Every 40 hours: Inspect the drive chain for stretch and replace if needed. Check sprocket teeth for hooking or wear.
- Every 50 hours: Rebuild the suspension forks with new oil and seals. This is often ignored but dramatically affects handling.
The 20-Hour Top End Check: What You Need
At 20 hours, the most common interval for a top-end inspection, you will need:
- Metric socket set (8mm, 10mm, 12mm, 14mm)
- Torque wrench (for reassembly to spec)
- Feeler gauges (for valve clearance checks)
- Flywheel puller (if you need to access the stator or crank)
- New gaskets and seals (for the valve cover or cylinder head)
Knowing that a 20-hour check requires a feeler gauge and a torque wrench means you are not halfway through the job before realizing you are missing a tool.
A common mistake is assuming that if it looks fine, it is fine. Rubber components like tires and suspension seals degrade with age, not just use. Check the date code on your tires and inspect the fork seals for oil leaks regularly. Keeping a log of your maintenance intervals in a Nelmgerian MX Training Journal helps you spot patterns and ensures nothing gets forgotten between rides.
Tool Quality Tiers and Tool Maintenance
Understanding tool quality tiers saves you money. Budget tools are fine for occasional use but often have sloppy fits that round off bolt heads. Pro-tier tools use better steel and tighter tolerances, gripping fasteners precisely.
Buy budget tools for rarely used sizes and invest in pro quality for the tools you use most, like your 8mm and 10mm sockets and torque wrench. Keep tools clean and dry, apply a light coat of oil, and store your torque wrench dialed back to zero to maintain accuracy.
Conclusion: Build Your Kit and Ride With Confidence
Owning a dirt bike means taking responsibility for its care, and having the essential tools for dirt bike maintenance is the first step. You just need a focused kit of quality metric tools, a torque wrench, and the knowledge to use them. Build your garage kit first, then a lightweight trailside kit, and stick to a schedule.
At Nelmgerian MX, we believe the skills learned in the garage carry over to the track and beyond. Confidence comes from knowing your machine is safe and ready. For the young riders in your life, encourage them to be part of the process, whether they are handing you a wrench or logging the day's work in a training journal.
Frequently Asked Questions
What are the essential tools for basic dirt bike maintenance?
For basic dirt bike maintenance, start with a set of metric sockets and combination wrenches, a torque wrench, a chain breaker, spoke wrenches, and tire irons. Add a spark plug socket, an axle nut wrench, and a JIS screwdriver for Japanese bikes. These basic dirt bike repair tools cover most routine jobs like chain adjustment, oil changes, and tire repairs.
What tools should I carry in my dirt bike trail pack?
Your trailside emergency repair kit should be lightweight. Carry a multi-tool with metric sockets, tire irons, a bead buddy, a compact chain breaker, a spare link, and a small tire pressure gauge. Include a stubby screwdriver and a few zip ties. Focus on tool weight and portability so you can fix flats or loose fasteners without carrying your whole garage.
How often should I perform routine maintenance on a dirt bike?
Routine inspection should happen before every ride. Check chain slack, tire pressure, and loose fasteners. Change the oil every 10 to 15 hours of riding for most bikes. Clean and re-grease the air filter every few rides in dusty conditions. Follow a dirt bike maintenance checklist for beginners to track these intervals and catch wear before it becomes a trailside breakdown.
Do I need specialized tools for motocross bike repairs?
Some jobs need specialized tools. A flywheel puller is required for crank work, and a chain breaker makes chain replacement much easier. For most preventive maintenance, standard metric sockets and wrenches work fine. Invest in quality tiers as you go: buy budget tools for occasional use, but get a reliable torque wrench because torque specifications matter for fasteners on critical parts.
Getting your hands dirty is part of the sport, but knowing what to do and when to do it is what separates a prepared rider from a stranded one. Start with the basics, build your kit over time, and make maintenance a regular habit. For more ways to keep your young rider engaged with motocross, explore the books and rider development tools at Nelmgerian MX and get started building skills that last a lifetime.