 how-to
How Do You Choose the Right Motocross Protective Gear?
Last Updated: October 25, 2026
Quick Summary
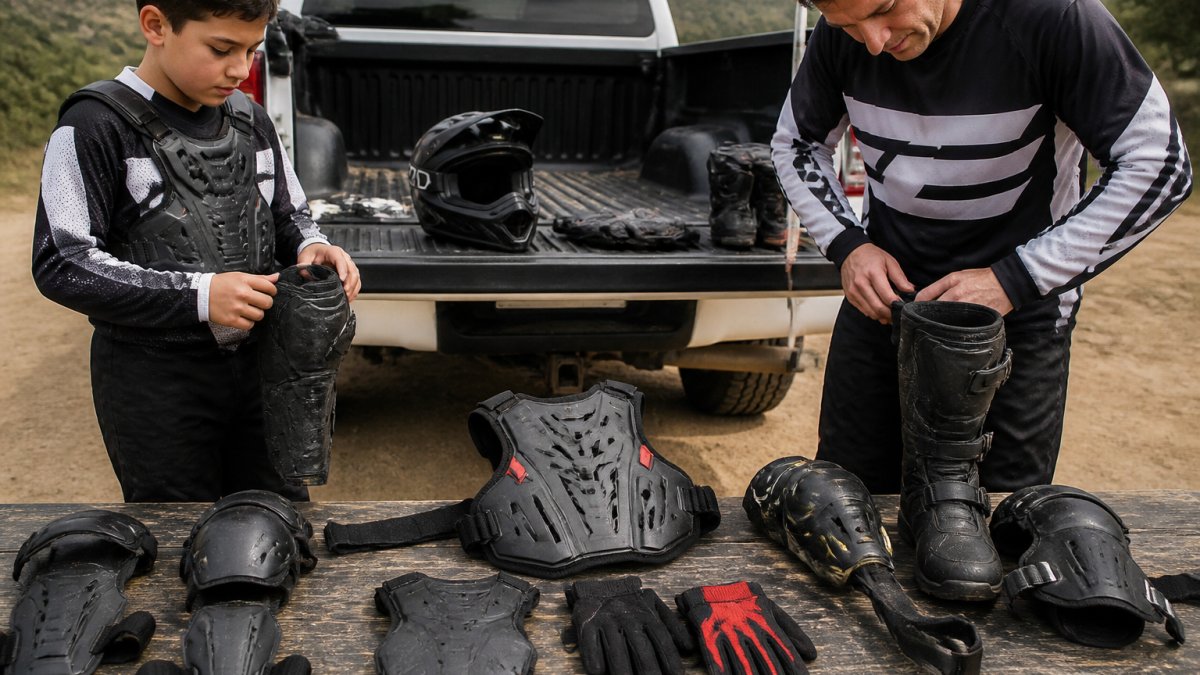
To choose the right motocross protective gear for safety, build a full kit as a system rather than buying one item: helmet, goggles, boots, gloves, chest protector or body armor, knee guards or braces, elbow guards, and jersey and pants. Fit each piece correctly and verify helmet certification, because gear reduces risk but does not erase it.
- Alpinestars' 2026 checklist names six core items: helmet, boots, goggles, jersey and pants, gloves, and body armor.
- A helmet should lift the skin of your forehead when you push up on the chin bar, not rotate backward.
- DOT, Snell, and ECE 22.06 are the helmet certifications to check for on the inside of the shell.
- Knee guards suit most riders; knee braces are for riders with a diagnosed knee injury or doctor's recommendation.
- Replace a helmet after any head-impact crash or at the manufacturer's service life, commonly five years from manufacture.
Table of Contents
- Start With a Motocross Protective Gear Checklist
- How to Fit a Motocross Helmet and Verify Its Certification
- Goggles, Gloves, and Boots: Protection for Eyes, Hands, and Feet
- How Should a Chest Protector Fit Over Your Jersey?
- Motocross Knee Braces vs Knee Guards: Which Do You Need?
- Match Your Gear to Riding Conditions and Discipline
- Inspect, Clean, and Replace Your Gear on a Schedule
- Build Your Young Rider's Gear Plan With Nelmgerian MX
- Frequently Asked Questions
Start With a Motocross Protective Gear Checklist
Learning how to choose the right motocross protective gear for safety starts with one mindset shift: gear is a system, not a single purchase. A helmet alone does not protect a rider.
A beginner checklist from Alpinestars' 2026 motocross gear checklist names six core items: helmet, boots, goggles, jersey and pants, gloves, and body armor. Skip one and you leave a gap.
Here is the checklist we recommend working through, in priority order:
- Helmet, head protection first, always
- Goggles, eye protection that seals against dust and roost
- Boots, ankle and foot protection
One caution before you shop. A 2018 study published in PubMed Central's evaluation of protective equipment among motorbike riders concluded that riders should not rely on protective equipment as their only measure of injury prevention.
How to Fit a Motocross Helmet and Verify Its Certification
A motocross helmet only protects when it fits correctly and carries a verifiable certification. Fit and certification are separate checks, and you need both before the first ride.
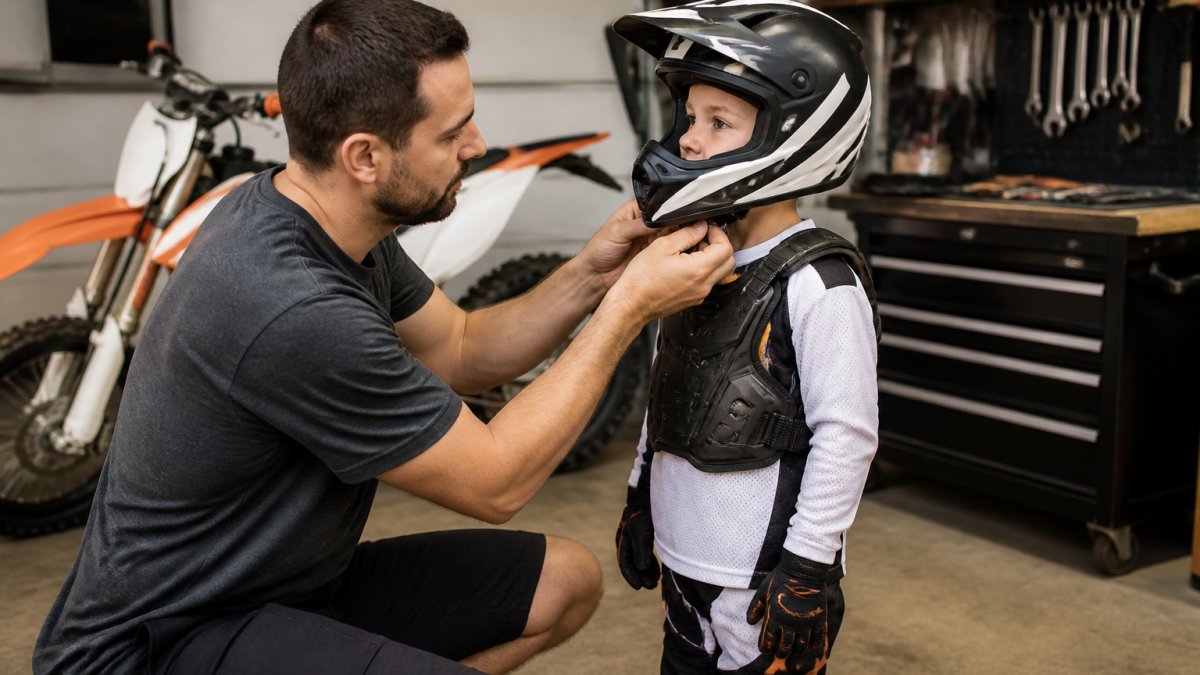
Step-by-step helmet fit check
Run this sequence every time you try a helmet, whether new or handed down:
- Measure the head. Wrap a soft tape around the widest part of the head, about one inch above the eyebrows and around the fullest part of the back. Write the number down. Helmet sizing charts are not interchangeable between brands, so match the measurement to that specific manufacturer's chart rather than assuming a size carries over.
- Fasten the chin strap first. A loose strap lets a correctly sized shell slide. Snug the strap until you can fit no more than two fingers under the chin, then re-check fit.
- Push up on the chin bar. The helmet should lift the skin of your forehead, not rotate backward off the head. If it rolls back easily, the shell is too large or the shape does not match your head.
- Shake side to side. The helmet should move with your head, not wobble independently. Cheek pads should press firmly against the cheeks without pinching the jaw.
- Check forehead and crown pressure. Look for red pressure points after two minutes of wear. A hot spot at the forehead usually means the shell is too small or the wrong internal shape.
- Confirm the strap sits flat. The buckle should sit under the chin, not on the jawbone, and the loose end should tuck into the retention clip so it cannot catch on roost or branches.
A common pattern is that riders buy a helmet that feels comfortable standing still, then discover it lifts at speed because the cheek pads are too soft. If the helmet moves when you push up on the chin bar, size down or try a different shell shape before adding padding.
What the certification labels actually mean
In the United States, a motocross helmet sold for on-road or dual-sport use must carry the DOT mark, which indicates the manufacturer certifies compliance with Federal Motor Vehicle Safety Standard 218. For closed-course competition, many sanctioning bodies and tracks also require Snell Foundation certification or ECE 22.06 approval. Each standard tests differently:
- DOT (FMVSS 218) sets a minimum performance floor for impact attenuation, penetration resistance, and retention system strength. It is self-certified by the manufacturer, so the label is a claim of compliance rather than a government test result.
- Snell certification is issued by the Snell Memorial Foundation after independent testing of sample helmets, with standards updated periodically. Snell M-rated helmets are common in motocross and off-road competition.
- ECE 22.06 is the current European standard and is increasingly accepted at U.S. tracks that host international or amateur racing. It includes rotational-impact and oblique-impact test requirements that older standards do not.
A helmet without a verifiable label is not safety gear. Check the inside of the shell for the DOT label and any Snell or ECE sticker, and confirm the model appears on the certifying body's published list where one exists. Do not buy a used helmet with a missing or painted-over label, and do not trust a seller's verbal claim of certification.
For a deeper walkthrough of sizing and certification, our guide on how to choose your first dirt bike helmet covers the same checks step by step.
Goggles, Gloves, and Boots: Protection for Eyes, Hands, and Feet
Eye, hand, and foot protection fail in predictable ways, and each fix is simple once you know it.
Goggles. A secure fit means the frame seals against the face without pinching the nose.
Gloves. Slipping gloves are the most common complaint.
Boots. Ankle protection depends on a stiff, broken-in boot that still lets you shift and brake. Buckle boots snugly from the bottom up.
How Should a Chest Protector Fit Over Your Jersey?
A chest protector should sit close to the body, cover the sternum and ribs, and stay in place when you raise your arms. It should not hang loose or ride up over the shoulders.
Fit it in this order:
- Put on your jersey first, then the protector over it
- Tighten shoulder straps so the chest plate sits flat
- Check side coverage reaches around the ribs
Roost vests offer lighter coverage for track days, while hard-shell chest protectors add more impact protection. Neither replaces a helmet or boots. Body armor is one layer in a system, and it works best when the layers fit together without pressure points.
Motocross Knee Braces vs Knee Guards: Which Do You Need?
Knee guards suit most riders. Knee braces are for riders with a diagnosed knee injury, a history of instability, or a doctor's recommendation. That is the short answer, and it is the one worth remembering.
Here is how the two compare:
| Feature | Knee Guards | Knee Braces |
|---|---|---|
| Main job | Impact and abrasion protection | Support and limit harmful motion |
| Best for | Beginner and casual riders | Riders with prior knee injury |
| Fit priority | Snug sleeve, no slip | Custom hinge alignment |
| Comfort trade-off | More mobility | More structure, less flex |
| Cost level | Lower | Higher |
Fit both the same way: strap them on, bend the knee fully, and check that the pad stays centered on the kneecap. If a guard slides down mid-ride, it protects nothing.
Match Your Gear to Riding Conditions and Discipline
Track riding, trail riding, and enduro put different demands on gear. Motocross tracks reward hard-shell chest protection and stiff boots built for jumps and ruts. Trail and enduro riding reward ventilation, lighter armor, and gear that lets you move on and off the bike.
Conditions change the math too:
- Dry, dusty tracks call for sealed goggles and spare lenses
- Muddy courses favor gear that sheds weight and cleans easily
- Cold mornings mean layering under the jersey, not over the armor
Not sure which discipline fits your family? Our comparison of motocross vs enduro for a family hobby breaks down the differences before you commit to a gear style.
Inspect, Clean, and Replace Your Gear on a Schedule
Gear wears out quietly. A cracked shell, a stretched strap, or a flattened pad can look fine and still fail when it counts. The fix is a written inspection routine with specific wear indicators and replacement triggers for each item, not a general reminder to clean things.
Item-by-item wear indicators and replacement triggers
| Item | What to inspect | Wear indicator | Replace when |
|---|---|---|---|
| Helmet | Shell, liner, chin strap, date code | Cracks, compressed EPS liner, frayed strap, expired date code | After any head-impact crash, or at the manufacturer's service life (commonly five years from manufacture) |
| Goggles | Lens, frame seal, strap | Scratched lens, hardened foam seal, stretched strap | Lens when vision is impaired; frame when the seal no longer contacts the face |
| Boots | Sole, buckles, ankle hinge, stitching | Worn sole lugs, cracked plastic, loose buckles, separated stitching | When the sole no longer grips the peg or the ankle structure flexes beyond its designed range |
| Gloves | Palm, seams, wrist closure | Thin or torn palm, split seams, stretched closure | When the palm no longer protects against abrasion or the closure will not stay snug |
| Chest protector / body armor | Shell, straps, foam padding | Cracked hard shell, stretched straps, compressed foam | After a hard impact that cracks the shell, or when padding no longer rebounds |
| Knee guards / braces | Hinge, straps, pad | Worn hinge, stretched straps, flattened pad | When the hinge develops play or the pad no longer stays centered on the kneecap |
| Jersey and pants | Seams, abrasion panels, closures | Split seams, worn-through abrasion panels, broken zippers | When abrasion coverage is compromised at hips, knees, or elbows |
Cleaning and storage that extend gear life
- Helmet: Remove the liner if the model allows it, hand-wash with mild soap, and air-dry away from direct sun. Never soak the shell or use solvents, which can degrade the EPS liner. Store the helmet in a bag or box, not on a peg where the liner can compress.
- Goggles: Rinse lenses with clean water, blot dry with a microfiber cloth, and avoid wiping grit across the lens. Store goggles in a case so the foam seal is not crushed.
- Boots: Rinse mud off with low-pressure water, dry at room temperature, and treat leather or synthetic panels per the manufacturer's instructions. Do not dry boots on a radiator or in direct sun, which can warp plastic components.
Post-crash replacement rules
A helmet that has taken a real impact is done, even if it looks perfect. The EPS liner crushes to absorb energy, and it does not recover. Replace the helmet after any crash with head contact, and replace any helmet past its date code. For boots and body armor, replace any hard component that cracks or deforms, and replace straps that stretch or fray.
Cleaning keeps gear working longer, and our seven-step guide on how to clean your dirt bike properly pairs well with a gear care routine.
Build Your Young Rider's Gear Plan With Nelmgerian MX
Young riders grow fast, which makes gear planning a moving target.
At Nelmgerian MX, we help families keep kids connected to the sport between practice days. Our motocross training journals give young riders a place to track goals, practice notes, and race progress.
Ready to build a plan for your rider? Contact us with your questions, or browse our kids dirt bike motocross books to start their collection.
Frequently Asked Questions
What protective gear do you need for motocross?
A complete motocross protective gear setup includes a certified helmet, goggles, gloves, riding jersey and pants, motocross boots, a chest protector or roost guard, and knee guards or braces. Elbow guards and a neck brace are optional additions depending on your riding level and conditions. Treat these items as one system rather than buying a helmet alone, since each piece covers a different impact zone and they are designed to work together.
How often should motocross protective gear be replaced?
Replace a helmet after any hard crash or when the shell shows cracks, even if it looks fine on the outside. Goggles should be swapped when the lens is scratched or the foam seal breaks down. Boots, gloves, and knee guards last longer but need inspection before every ride for worn straps, torn stitching, or cracked plastic. As a general rule, check all gear for damage after each ride and replace anything that no longer fits snugly or holds its shape.
Should motocross knee braces fit over or under pants?
Most motocross knee braces are designed to be worn against the skin or over a thin liner, then covered by riding pants that have enough room in the knee area. Wearing a brace over bulky pants can cause it to shift and reduce protection. Check that the brace stays centered on the knee when you bend and straighten your leg, and that the pants do not pinch or restrict the brace's hinges.
What is the difference between a chest protector and a roost guard?
A chest protector is built for impact absorption and usually carries a higher certification level, with padding and a hard outer shell. A roost guard is lighter and mainly deflects rocks and debris thrown up by other bikes, offering less direct impact protection. Choose a certified chest protector for racing and aggressive riding, and a roost guard for casual trail days where weight and airflow matter more.
Gear choices get easier when you have a guide who knows the sport and the family behind the rider. Nelmgerian MX offers rider training journals for tracking progress, storybooks that build confidence, and screen-free activities that keep kids learning between races. Get started with Nelmgerian MX and give your young rider the tools to succeed on and off the track.